delupet shock collar manual
DeluPet DT-68 Shock Collar Manual: Comprehensive Guide
This manual provides detailed instructions for the DeluPet DT-68 dog training collar. Learn about pairing, operation, training techniques, and troubleshooting for effective and safe use.
Welcome to the DeluPet DT-68 Dog Training Collar system! This advanced training tool is designed to help you effectively communicate with your dog and address unwanted behaviors. The DT-68 utilizes three primary training modes: a standard beep, adjustable vibration, and static stimulation. These functions, controlled via a remote transmitter, allow for customized training tailored to your dog’s temperament and learning style.
Before beginning, carefully review this manual to understand the features, safety precautions, and proper operation of the DT-68. Successful training relies on consistency, patience, and positive reinforcement. The DeluPet DT-68 is not intended to be a quick fix, but rather a tool to enhance your communication and build a stronger bond with your canine companion. Remember responsible use is paramount for a positive training experience.
This collar is designed for dogs of various sizes and breeds, offering adjustable settings to suit individual needs.
Understanding the Components
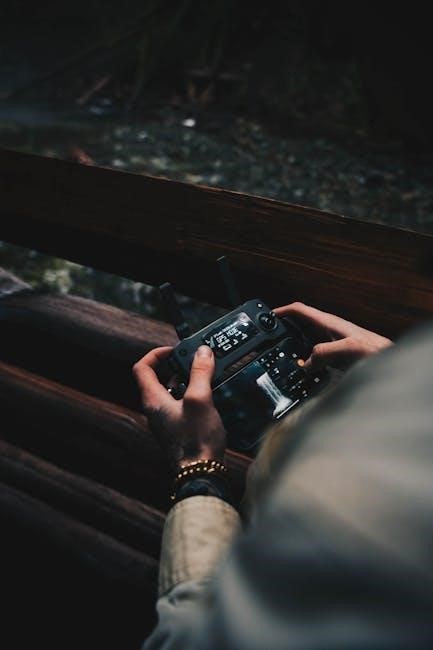
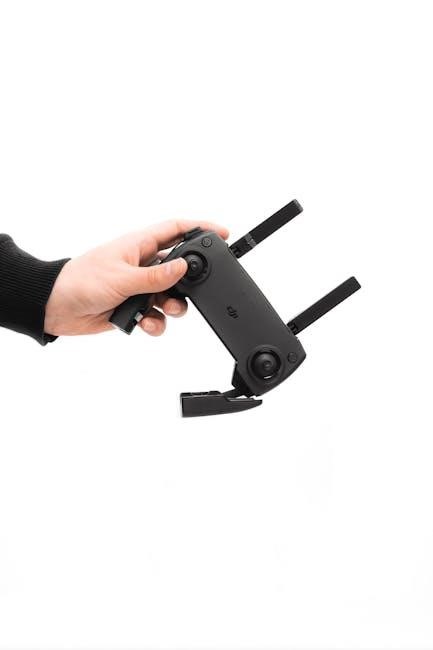
The DeluPet DT-68 system comprises two main units: the Remote Transmitter and the Receiver Collar. The Remote Transmitter features clearly labeled buttons for Beep, Vibration, and Static Shock commands, alongside level adjustment controls. It requires regular charging to ensure optimal performance.
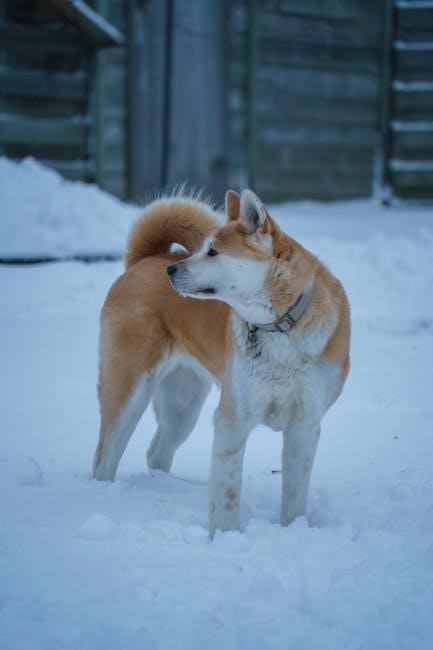
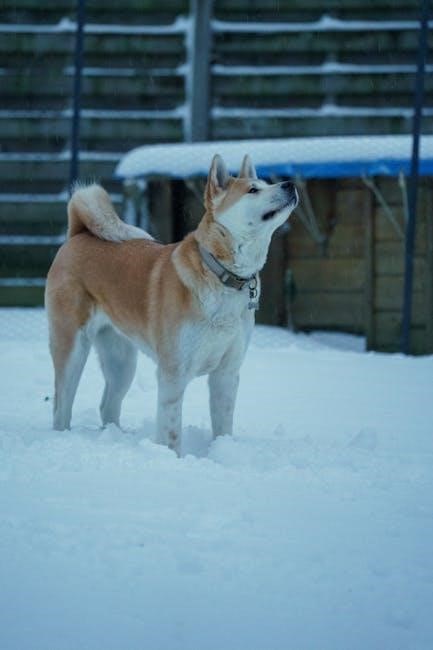
The Receiver Collar houses the stimulation contacts, a vibration motor, and a speaker for the beep function. It’s designed to comfortably fit around your dog’s neck and is adjustable for various sizes. The collar also contains a charging port for replenishing its battery.
Familiarize yourself with each component’s functionality before use. The remote’s display indicates the selected stimulation level. Ensure the collar’s contact points are clean and properly positioned against your dog’s skin for effective communication. Proper understanding of these components is crucial for safe and effective training.
Safety Precautions

Prioritize your dog’s well-being when using the DeluPet DT-68. Never use the collar on puppies under six months old or dogs with aggressive tendencies without professional guidance. Always begin with the lowest stimulation level and gradually increase only if necessary.
Avoid prolonged or continuous stimulation. Limit static shock duration to a few seconds. Regularly inspect your dog’s skin for any signs of irritation or discomfort at the contact points. Discontinue use immediately if redness or sores develop.
This device is a training aid, not a punishment tool. Focus on positive reinforcement alongside the collar’s use. Never use the collar to address aggression issues; consult a certified dog trainer or behaviorist. Responsible use ensures a safe and effective training experience for your canine companion.

Setting Up Your DeluPet DT-68
Proper setup is crucial for effective training. This section details pairing the remote and receiver, charging procedures, and ensuring a secure and comfortable collar fit for your dog.
Pairing the Remote and Receiver Collar
Establishing a connection between the remote transmitter and the receiver collar is the first essential step. If you’ve just received your DeluPet DT-68, pairing might be necessary before operation. Many users have inquired about this process, particularly on platforms like Reddit’s r/instructionmanuals.
While specific steps aren’t explicitly detailed in the provided snippets, the general principle involves initiating a pairing mode on both devices. Typically, this involves pressing and holding a specific button (or combination of buttons) on both the remote and the collar receiver. Look for an indicator light on the receiver – it will likely flash to confirm it’s in pairing mode.
Continue holding the buttons until the indicator light changes, signifying a successful connection. If pairing fails, repeat the process, ensuring both devices are close to each other. A stable connection is vital for reliable training sessions, allowing commands to be transmitted effectively.
Charging the Remote and Receiver
Maintaining optimal battery levels is crucial for consistent performance of your DeluPet DT-68 training system. Both the remote transmitter and the receiver collar require regular charging to ensure uninterrupted training sessions. While the provided information doesn’t detail specific charging times or methods, it’s reasonable to assume both utilize a standard charging cable – likely USB.
Before the initial use, fully charge both devices. During charging, observe the indicator lights; they typically change color (e.g., from red to green) to signal a full charge. Avoid overcharging, as this can potentially reduce battery lifespan.
Regularly check battery levels, especially before longer training sessions. A depleted battery mid-training can disrupt the process and frustrate both you and your dog. Consistent charging habits will guarantee the DeluPet DT-68 is always ready when you need it.
Collar Fitting and Adjustment
Proper collar fit is paramount for both comfort and effective training with the DeluPet DT-68. A correctly fitted collar ensures the contact points maintain consistent contact with your dog’s skin, crucial for delivering the intended stimulation. The collar should be snug enough to prevent slipping during activity, but not so tight as to cause discomfort or restrict breathing.
Begin by placing the collar around your dog’s neck, ensuring the receiver is centered. You should be able to comfortably slide two fingers between the collar and your dog’s skin. Adjust the strap using the buckle to achieve this fit. Regularly check the fit, especially on growing puppies or dogs with fluctuating weight.
Incorrect fitting can lead to ineffective training or, worse, skin irritation. Always prioritize your dog’s comfort and well-being when adjusting the collar.

Operating the Remote Transmitter
The DeluPet DT-68 remote features intuitive button controls for Beep, Vibration, and Static Shock commands. Adjust intensity levels for customized training, ensuring effective communication with your dog.
Overview of Button Functions
The DeluPet DT-68 remote transmitter is designed for ease of use, featuring dedicated buttons for each command. Understanding these functions is crucial for effective training.
The Beep button emits an audible tone from the receiver collar, serving as a non-stimulating attention-getter. This tone has a fixed volume and is ideal for initial training stages or reinforcing known commands.
The Vibration button activates a vibrating sensation on the receiver collar. This is a milder form of communication, useful for dogs sensitive to static shock or for capturing their attention from a distance. The intensity of the vibration is adjustable, ranging from levels 1 to 9, allowing you to find the appropriate setting for your dog’s temperament.
Finally, the Static Shock button delivers a static stimulation to the receiver collar. This should be used cautiously and responsibly, as it is the most intense command. The stimulation level is also adjustable, allowing for precise control and minimizing discomfort. Remember to start with the lowest level and gradually increase it only if necessary.
Beep Command – Functionality
The Beep command on the DeluPet DT-68 serves as a foundational tool for capturing your dog’s attention without employing any corrective stimulation. It’s a purely auditory signal, designed to act as a gentle cue.
When the Beep button is pressed on the remote transmitter, the receiver collar emits an audible tone. This tone is non-adjustable in volume, ensuring consistent delivery. It’s particularly useful during the initial stages of training, helping to associate the sound with desired behaviors.
Think of the beep as a verbal “check-in.” You can use it to interrupt unwanted behaviors, redirect your dog’s focus, or simply acknowledge their presence. It’s a less intrusive method than vibration or static, making it ideal for sensitive dogs or situations where a subtle cue is preferred. Consistent use of the beep, paired with positive reinforcement, can establish a clear communication channel with your canine companion.

Vibration Command – Operation
The Vibration command on the DeluPet DT-68 offers a more noticeable cue than the Beep, utilizing a gentle vibration to gain your dog’s attention. It’s a useful step up in intensity when the beep isn’t sufficient, but still avoids any form of static correction.
To activate the Vibration command, simply press the designated vibration key on the remote transmitter. This will cause the receiver collar to vibrate once. The intensity of the vibration is adjustable, allowing you to tailor the sensation to your dog’s sensitivity and temperament.
After pressing the vibration key, use the side vibration button to cycle through the available levels, ranging from 1 to 9. Each level represents a different intensity of vibration. Experiment to find the lowest setting that effectively gets your dog’s attention without causing discomfort or anxiety. This command is excellent for reinforcing training or interrupting unwanted behaviors.
Adjusting Vibration Levels (1-9)
The DeluPet DT-68 allows for precise control over the vibration intensity, offering nine distinct levels to suit your dog’s individual needs. Adjusting these levels is crucial for effective and humane training.
After initiating the vibration command by pressing the vibration key, the side vibration button becomes active for level adjustment. Each press of this button will increment the vibration level, cycling through the range of 1 to 9. A higher number indicates a stronger vibration. Observe your dog’s reaction carefully as you increase the level.
Start with the lowest setting (level 1) and gradually increase it until you achieve a noticeable response from your dog – a head turn, ear perk, or a change in behavior. Avoid using levels that cause your dog to appear distressed or uncomfortable. Remember, the goal is to gain attention, not to punish.
Understanding Vibration Level Intensity
The nine vibration levels on the DeluPet DT-68 offer a spectrum of intensity, designed to cater to varying sensitivities and breeds. Lower levels (1-3) provide a subtle sensation, ideal for sensitive dogs or initial training phases, acting as a gentle nudge to gain attention.
Mid-range levels (4-6) deliver a more noticeable vibration, suitable for dogs who require a stronger stimulus to respond. These levels are effective for reinforcing commands or redirecting unwanted behaviors. Higher levels (7-9) offer a significant vibration, best reserved for dogs with high energy levels or those who are less responsive to lower settings.
Always prioritize your dog’s comfort. Observe their body language closely; signs of stress indicate the level is too high. The vibration should be sufficient to get their attention without causing fear or anxiety.
Static Shock Command – Operation
The static shock command on the DeluPet DT-68 delivers a stimulation intended to interrupt unwanted behaviors. Pressing the designated “Static” button transmits the currently selected intensity level to the receiver collar. It’s crucial to understand this feature requires responsible and judicious use.
Before employing static correction, ensure your dog understands basic commands. Begin with the lowest level and gradually increase it only if necessary. Observe your dog’s reaction carefully; the goal is to gain compliance, not to inflict pain. Avoid prolonged or continuous stimulation.
Remember, static shock should be a last resort. Prioritize positive reinforcement and other training methods. Misuse can lead to fear, anxiety, and aggression. Always consult with a professional dog trainer if you are unsure about proper usage.

Adjusting Static Shock Levels
The DeluPet DT-68 allows for precise adjustment of static shock levels, enabling you to tailor the intensity to your dog’s sensitivity and temperament. Typically, these collars feature a range of levels, often numbered sequentially. Use the designated buttons on the remote transmitter to increase or decrease the stimulation strength.
Start with the lowest possible level – often labeled ‘1’ – and observe your dog’s response during training. Gradually increase the level, one increment at a time, only if the dog doesn’t respond to the lower setting. Never jump to higher levels without first testing the lower ones.
Pay close attention to your dog’s behavior. The goal is to find the lowest level that effectively interrupts the unwanted behavior, not to maximize the shock. Excessive levels can cause distress and damage your relationship with your pet.
Understanding Static Shock Level Intensity
Static shock levels on the DeluPet DT-68 are designed to provide a range of stimulation, from a barely perceptible tickle to a more noticeable correction. Lower levels (1-3) are generally suited for smaller dogs or those with sensitive temperaments, delivering a mild sensation intended to grab their attention;
Mid-range levels (4-6) offer a more pronounced correction, appropriate for medium-sized dogs or those requiring a firmer response. Higher levels (7-9) should be reserved for larger, more stubborn dogs, and used with extreme caution. Always prioritize the lowest effective level.
Remember, the perceived intensity varies significantly between individual dogs. Factors like coat thickness, muscle mass, and personality all play a role. Observe your dog closely for any signs of distress, such as yelping, whining, or excessive fear, and immediately reduce the level if observed.

Training with the DeluPet DT-68

Effective training utilizes consistent commands and positive reinforcement. Address unwanted behaviors with the collar, but always prioritize rewarding desired actions for optimal results.
Basic Obedience Training Techniques
Start with foundational commands like “sit,” “stay,” and “come.” Utilize the DeluPet DT-68 to reinforce these behaviors. Begin in a distraction-free environment, gradually increasing difficulty.
When your dog performs the desired action, immediately use the beep command as a marker signal. This associates the sound with positive behavior; If the dog hesitates, a gentle vibration (starting at level 1) can provide a prompt.
Avoid using static shock for initial training. Focus on positive reinforcement and lower-level corrections only when necessary. Keep training sessions short and engaging – 5-10 minutes is ideal. Consistency is key; practice daily for best results.
Remember to always end on a positive note, rewarding your dog with praise or a treat. The goal is to create a clear association between commands, corrections (when needed), and positive outcomes. Proper timing and consistency will lead to successful obedience training with the DeluPet DT-68.
Addressing Problem Behaviors
The DeluPet DT-68 can assist in modifying unwanted behaviors like excessive barking, jumping, or leash pulling. However, understanding the cause of the behavior is crucial. Is it anxiety, boredom, or lack of training? Address the root cause alongside collar use.
For barking, identify the trigger. Use the beep command to interrupt the barking before it escalates. If that’s insufficient, a low-level vibration can redirect attention. Avoid harsh static corrections for nuisance barking.
With leash pulling, the collar can provide a gentle reminder to stay by your side. A quick, low-level static correction (if necessary) when pulling can discourage the behavior.
Always pair corrections with clear verbal commands (“leave it,” “easy”). Focus on rewarding desired behaviors – walking nicely on a loose leash, remaining quiet. Consistency and patience are vital for successful behavior modification using the DeluPet DT-68.
Positive Reinforcement Methods
While the DeluPet DT-68 offers corrective features, prioritizing positive reinforcement is paramount for effective and humane training. Pair collar use with rewards – treats, praise, or toys – to motivate desired behaviors. This builds a positive association with obedience.
When teaching a new command, use the beep or vibration as a cue, immediately followed by a reward when the dog complies. Gradually phase out the collar as the dog understands the command.
Reward calm behavior. If your dog is quiet, offer a treat. If they walk nicely on a leash, provide praise. This reinforces the behaviors you want to see.
Avoid relying solely on corrections. A balanced approach – combining positive reinforcement with occasional, low-level corrections when needed – yields the best results. Remember, the goal is to teach, not punish. Consistent positive reinforcement fosters a stronger bond with your dog.
Troubleshooting Common Issues
If experiencing problems, check remote-receiver pairing, collar responsiveness, and battery life. Ensure proper charging and fitting for optimal performance and reliable operation.
Remote Not Connecting to Receiver
Experiencing difficulty pairing your DeluPet DT-68 remote with the receiver collar is a common issue, but often easily resolved. First, ensure both devices are adequately charged; a low battery can interfere with the pairing process. Confirm that no other DeluPet devices are nearby, as this could cause signal interference.
To initiate pairing, locate the pairing button (refer to the ‘Understanding the Components’ section for its location). Simultaneously press and hold the pairing button on both the remote transmitter and the receiver collar. You should observe a visual indicator – typically a flashing light – on both devices confirming they are in pairing mode.
Allow several seconds for the pairing process to complete. A solid light or a specific beep tone usually indicates a successful connection. If pairing fails after multiple attempts, try resetting both devices. Consult the ‘Factory Reset’ instructions (if available in the full manual) or contact DeluPet customer support for further assistance. Remember to keep the devices within close proximity during the pairing procedure.
Collar Not Responding
If your DeluPet DT-68 receiver collar isn’t responding to commands from the remote, several factors could be at play. Begin by verifying the collar is powered on; a quick press of the power button should illuminate an indicator light. Ensure the collar is within the operational range of the remote – excessive distance can disrupt the signal.
Next, check the battery level of both the remote and the collar. Low batteries are a frequent cause of responsiveness issues. Attempt to cycle through the different command modes (Beep, Vibration, Static) on the remote to rule out a problem with a specific function.
If the issue persists, try re-pairing the remote and collar following the instructions in the ‘Pairing the Remote and Receiver Collar’ section. A corrupted pairing can lead to communication failures. If none of these steps resolve the problem, contact DeluPet’s customer support team for specialized troubleshooting guidance;
Battery Life Issues
Experiencing short battery life with your DeluPet DT-68? Several factors can contribute to quicker battery drain. Frequent use of the static shock function consumes significantly more power than utilizing the beep or vibration modes. Higher intensity levels, particularly in static shock, also accelerate battery depletion.
Ensure both the remote and receiver collar are fully charged before each training session. Avoid leaving the devices exposed to extreme temperatures, as this can negatively impact battery performance. When charging, use only the provided DeluPet charging cable to prevent damage and ensure optimal charging efficiency.
If battery life remains unsatisfactory, consider reducing the frequency of static shock usage and prioritizing positive reinforcement techniques. Contact DeluPet support if you suspect a faulty battery or charging port.
Advanced Features & Considerations
Explore the DT-68’s full potential! Understand range limitations, practice proper collar maintenance, and thoughtfully consider the ethical implications of using a shock collar.
Range Testing and Limitations
Understanding the operational range of your DeluPet DT-68 is crucial for effective training. The advertised range provides a maximum distance under ideal conditions – a clear, unobstructed line of sight. However, real-world environments often present challenges that significantly reduce this range.
Factors like buildings, trees, hills, and even weather conditions can interfere with the signal between the remote transmitter and the receiver collar. To accurately determine the usable range in your specific training areas, perform a range test.
Start by walking away from the collar while activating a command (beep, vibration, or static stimulation). Note the distance at which the collar no longer responds reliably. This will give you a realistic understanding of the effective range in that location.
Remember that the range is a guideline, not a guarantee. Always stay within a distance where you can confidently control your dog. Prioritize safety and avoid pushing the range to its absolute limit, as this could lead to inconsistent feedback and potentially confuse your pet.
Long-Term Collar Care and Maintenance
Proper care and maintenance will extend the life and ensure the reliable performance of your DeluPet DT-68. Regularly inspect the collar for any signs of damage, such as cracks in the plastic, frayed edges on the contact points, or damage to the battery compartment.
Clean the contact points with a soft, damp cloth after each use to remove any dirt or debris; Avoid using harsh chemicals or abrasive cleaners, as these can damage the collar. Ensure the collar is completely dry before storing it.
When not in use, store the remote and receiver in a cool, dry place, away from direct sunlight and extreme temperatures. Periodically check the battery levels and recharge them as needed, following the instructions in the charging section of this manual.
Avoid exposing the collar to water or submerging it, as this could cause damage to the electronic components. Consistent care will help maintain optimal functionality.
Ethical Considerations of Shock Collars
The use of shock collars, including the DeluPet DT-68, raises important ethical considerations. It’s crucial to prioritize humane training methods and understand the potential impact on your dog’s well-being. Shock should never be used as a first response to unwanted behavior; it should only be considered as a last resort after exhausting positive reinforcement techniques.
Misuse can cause unnecessary stress, fear, and anxiety in your dog, potentially damaging your relationship. Always start with the lowest stimulation level and gradually increase it only if necessary.
Focus on rewarding desired behaviors rather than punishing unwanted ones. Consider consulting with a professional dog trainer to develop a comprehensive training plan that prioritizes positive reinforcement and addresses the underlying causes of behavioral issues. Responsible ownership demands careful consideration of these ethical implications.