lippert 6 point leveling system manual

lippert 6 point leveling system manual

The Lippert 6 Point Leveling System offers efficient automatic and manual leveling for RVs, enhancing stability and convenience, especially for 5th wheel applications, with user-friendly operation.

1.1 Overview of the Lippert 6 Point Leveling System

The Lippert 6 Point Leveling System is an advanced RV leveling solution designed to provide stability and convenience. It utilizes six points of contact to ensure even weight distribution, enhancing safety and comfort. The system combines hydraulic jacks, sensors, and automation for precise leveling. Suitable for various RV sizes, it offers efficient setup and adjustment capabilities, making it ideal for both novice and experienced users. This system is engineered to streamline the leveling process, ensuring a smooth and stress-free experience for RV enthusiasts.

1.2 Importance of Leveling in RVs

Proper leveling is essential for RV stability, safety, and functionality. An unlevel RV can lead to uneven weight distribution, affecting appliances like refrigerators and potentially causing damage. Leveling ensures even ground contact, preventing structural stress and enhancing comfort. It also improves drainage and ensures proper operation of plumbing systems. Additionally, leveling is critical for accurate function of safety devices and appliances, making it a foundational step for a secure and enjoyable RV experience.

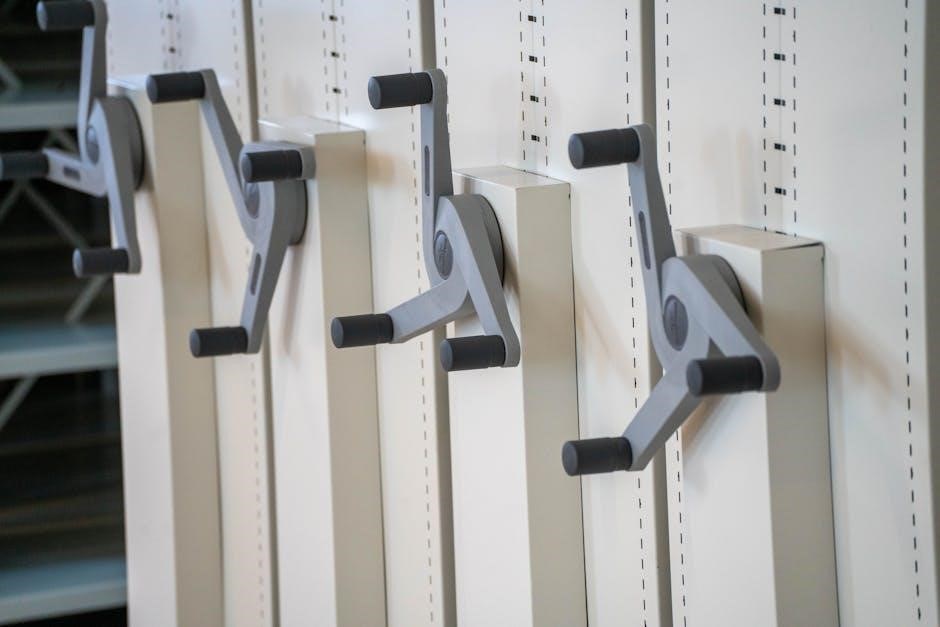
Components of the Lippert 6 Point Leveling System

The Lippert 6 Point Leveling System includes hydraulic jacks, a control panel, sensors, and automation features, ensuring precise and efficient RV leveling.

2.1 Hydraulic Jacks and Their Roles

The Lippert 6 Point Leveling System features heavy-duty hydraulic jacks designed to stabilize and level RVs efficiently. These jacks provide the lifting power needed to adjust the vehicle’s position, ensuring proper balance. They are built to handle the weight of large RVs and operate smoothly in various conditions. The hydraulic system ensures precise control, making it easier to achieve a level surface. These jacks are essential for both auto and manual leveling modes, offering reliability and durability for long-term use.

2;2 Control Panel and Its Functions

The control panel is the central hub of the Lippert 6 Point Leveling System, designed for easy operation. It features a user-friendly interface with buttons and an LCD screen for navigating system functions. The panel controls the hydraulic jacks, allowing for automatic or manual leveling. It also displays real-time data on the RV’s leveling status and system pressure. The control panel enables automatic leveling with the touch of a button and includes manual mode for fine-tuning. It also stores custom settings for convenience and ensures safe operation by monitoring system limits.

2.3 Sensors and Automation Features

The Lippert 6 Point Leveling System includes advanced sensors that detect the RV’s tilt and orientation, ensuring precise leveling. These sensors communicate with the control panel to automate the leveling process. The system also features automatic leveling, which adjusts the hydraulic jacks based on sensor data. Additionally, it includes memory functions that store preferred leveling positions, enhancing efficiency. The sensors and automation work together to provide quick, accurate, and hands-free leveling, making setup easier and reducing the need for manual adjustments.

Installation and Setup

Installation requires pre-installation checks, proper component mounting, and hydraulic system connection. Follow the manual for accurate setup, ensuring all sensors and jacks are calibrated correctly for optimal performance.

3.1 Pre-Installation Checks

Before installing the Lippert 6 Point Leveling System, ensure your RV is on a level surface and in neutral position. Check the frame for stability and damage. Verify all components, including hydraulic jacks and sensors, are undamaged and compatible with your RV. Ensure the hydraulic fluid level is adequate and the system is free from debris. Consult the manual for specific weight and vehicle requirements to ensure safe and proper installation. Proper preparation ensures optimal system performance and prevents potential issues during setup.

3.2 Step-by-Step Installation Guide

Mount the hydraulic jacks to the RV frame, ensuring proper alignment and torque specifications. Install the control panel in an accessible location, connecting it to the system’s hydraulic lines and sensors. Attach the sensors to the RV’s frame, aligning them accurately for precise leveling. Connect the electrical system, ensuring all wires are securely fastened. Test each jack individually to confirm proper function before final setup. Refer to the manual for specific torque and alignment details to ensure a safe and accurate installation process.

Operating the Lippert 6 Point Leveling System

Operating the system involves engaging Auto-Leveling mode for automatic stabilization or switching to Manual mode for precise adjustments, ensuring a stable and even RV setup.

4.1 Auto-Leveling Mode

The Auto-Leveling Mode on the Lippert 6 Point Leveling System provides a seamless and efficient way to stabilize your RV. Simply press the “Auto” button on the control panel, and the system will automatically detect unevenness, adjusting the hydraulic jacks to level the RV. This mode is ideal for quick setups, ensuring proper weight distribution and stability. Sensors continuously monitor the RV’s position, making precise adjustments to achieve a perfectly level surface. This feature is especially useful for new RV owners or those seeking a hands-off experience.

4.2 Manual Mode Operation

The Manual Mode on the Lippert 6 Point Leveling System allows for precise control over each hydraulic jack. Users can individually adjust the height of each jack using the control panel’s arrow buttons. This mode is ideal for fine-tuning the RV’s position on uneven terrain or when specific adjustments are needed. The system provides real-time feedback through the control panel, ensuring accurate leveling. Manual mode is particularly useful for experienced users who prefer a more hands-on approach or when the auto-mode doesn’t achieve the desired results.

Safety Information and Precautions

Ensure the RV is on level ground and stabilize it before operation. Always use jack stands for added safety and avoid overloading the system.

5.1 System Safety Warnings

Always adhere to the Lippert 6 Point Leveling System’s safety guidelines to avoid accidents. Never exceed the weight capacity or operate the system on uneven or soft ground. Ensure the system is fully disengaged during travel. Keep children and pets away while the system is in use. Failure to follow warnings may result in system damage or personal injury. Avoid overextending the jacks beyond their recommended height limits. Never rely solely on the system for stabilization without additional support when necessary.

5.2 Emergency Procedures

In case of system failure, immediately disconnect power to the Lippert 6 Point Leveling System. Stabilize the RV manually using blocks or leveling pads. If a jack malfunctions, do not attempt to repair it while under load; Contact a certified technician for assistance. Always keep a backup plan for manual leveling in emergencies. Never attempt to lower the RV without proper support. Ensure all occupants are clear of the area during any emergency stabilization process.

Maintenance and Troubleshooting

  • Regularly inspect hydraulic fluid levels and top up as needed.
  • Clean sensors to ensure accurate leveling readings.
  • Check hoses for damage and replace if necessary.
  • Lubricate moving parts to maintain smooth operation.
  • Schedule annual professional inspections for optimal performance.

6.1 Regular Maintenance Tips

Regular maintenance ensures optimal performance of the Lippert 6 Point Leveling System. Check hydraulic fluid levels monthly and top up as needed. Clean sensors and inspect hoses for damage or leaks. Lubricate all moving parts annually to prevent wear. Schedule professional inspections every 12 months to identify potential issues early. Keep the control panel free from dust and moisture. Follow the manual’s guidelines for torque specifications when tightening components. Proper upkeep extends the system’s lifespan and ensures reliable operation. Always refer to the manual for detailed procedures.

6.2 Common Issues and Solutions

Common issues with the Lippert 6 Point Leveling System include hydraulic leaks, sensor malfunctions, and system errors. For hydraulic leaks, inspect hoses and connections, tightening loose fittings. If sensors fail, clean them or replace as needed. System errors may require resetting the control panel or updating software. Jack misalignment can be corrected through manual adjustment. Always refer to the manual for troubleshooting steps and contact support for persistent problems. Regular checks help prevent these issues and ensure smooth operation.

User Manuals and Guides

The Lippert 6 Point Leveling System manual provides detailed installation, operation, and troubleshooting instructions. It also includes safety guidelines and warranty information for optimal system use.

7.1 What’s Included in the Manual

The Lippert 6 Point Leveling System manual includes detailed installation instructions, operating procedures, and troubleshooting guides. It also covers system components, maintenance schedules, and safety precautions. The manual provides step-by-step diagrams for proper setup and usage, ensuring users can optimize the system’s performance. Additionally, it outlines warranty information and contact details for customer support, making it a comprehensive resource for owners to understand and maintain their leveling system effectively.

7.2 Where to Find Additional Resources

For additional resources, visit the Lippert Components website, which offers downloadable PDF manuals and user guides. Online forums and RV communities also provide valuable insights and troubleshooting tips. Authorized dealers and service centers can offer personalized support and documentation. Additionally, customer support hotlines are available for direct assistance. These resources ensure comprehensive understanding and optimal use of the Lippert 6 Point Leveling System.

Advanced Features and Customization

The Lippert 6 Point Leveling System offers advanced features like customizable settings and memory functions, allowing users to tailor the system to their specific needs for enhanced stability and convenience.

8.1 Auto Re-Hitch Memory Function

The Lippert 6 Point Leveling System features an innovative Auto Re-Hitch Memory Function, designed to streamline the setup process. This advanced feature allows the system to remember the RV’s leveling position from its previous setup, enabling faster and more efficient releveling. By storing the last configuration, it minimizes manual adjustments, saving time and effort. This function is particularly useful for frequent campers who often return to the same campsites or prefer consistent leveling positions.

  • Stores the last leveling configuration for quick reuse.
  • Reduces the need for manual adjustments.
  • Enhances efficiency for frequent campers.

8.2 Customizing System Settings

The Lippert 6 Point Leveling System offers customizable settings to tailor the leveling experience to your preferences. Users can adjust sensitivity levels, set height preferences, and customize stabilization parameters. The control panel provides intuitive options to fine-tune these settings, ensuring optimal performance on various terrains. Saved profiles allow for quick recall of preferred configurations, enhancing convenience and efficiency. This feature ensures the system adapts to individual needs, providing a personalized leveling experience.

  • Adjust sensitivity and stabilization parameters.
  • Save custom profiles for quick recall.
  • Enhances system adaptability to different terrains.

Tips and Tricks for Optimal Use

  • Always choose firm, level ground to ensure stable setup.
  • Use the auto-leveling mode for quick and precise adjustments.
  • Check tire pressure before leveling for better stability.
  • Utilize the system’s memory function for repeat setups.

9.1 Efficient Setup Techniques

For optimal use of the Lippert 6 Point Leveling System, start by assessing the campsite terrain. Use the system’s sensors to guide initial placement. Engage the auto-leveling mode for quick adjustments, then fine-tune manually if needed. Ensure tires are chocked and stabilizer blocks are in place for added stability. Always refer to the manual for specific setup procedures tailored to your RV’s weight and dimensions. This ensures a safe and level setup every time, enhancing comfort and system performance. Regular practice improves efficiency.

9.2 Using the System in Challenging Terrains

When operating the Lippert 6 Point Leveling System on uneven or challenging terrains, ensure the RV is positioned on firm, level ground whenever possible. For slopes or soft surfaces, use leveling blocks or pads under the jacks for stability. Engage the manual mode to make incremental adjustments, as auto-leveling may struggle with extreme unevenness. Always monitor the control panel for real-time feedback and adjust slowly to avoid overextending the hydraulic jacks. This ensures safe and effective leveling even in difficult conditions.

Comparative Analysis with Other Leveling Systems

The Lippert 6 Point Leveling System surpasses traditional 4-point systems by offering enhanced stability and balance. Its advanced automation and precise control provide superior leveling accuracy and efficiency compared to manual or competing hydraulic systems, making it a top choice for RV enthusiasts seeking reliability and ease of use on various terrains.

10.1 Advantages Over 4-Point Systems

The Lippert 6 Point Leveling System offers superior stability and balance compared to traditional 4-point systems. With six points of contact, it ensures even weight distribution and reduces the risk of tipping. This system excels on uneven terrain, providing a smoother and more secure setup. Additionally, the 6-point design minimizes strain on individual jacks, enhancing durability. Its advanced automation and precise control make leveling faster and more accurate, offering a more reliable and comfortable experience for RV owners. This makes it a clear upgrade over 4-point systems.

10.2 Comparison with Competitor Products

The Lippert 6 Point Leveling System stands out among competitor products for its superior stability, ease of use, and advanced automation. Unlike many competitors, it offers a faster and more precise leveling process, reducing setup time significantly. Its durable construction and quieter operation set it apart, while the intuitive control panel enhances user experience. Additionally, Lippert’s system often includes superior customer support and warranty options, making it a top choice for RV enthusiasts seeking reliability and performance.

Frequently Asked Questions

This section addresses common user queries, troubleshooting, and maintenance tips, offering guidance on system functionality, optimal operation, and safety protocols for enhanced user experience.

11.1 Common User Queries

Users often ask about system functionality, troubleshooting, and maintenance. Queries include how to reset the system, resolve error messages, and perform manual leveling. Others seek advice on optimizing automatic leveling and understanding sensor calibration. Some inquire about hydraulic jack maintenance and how to address uneven terrain challenges. These questions highlight common concerns and provide a foundation for addressing user needs effectively.

11.2 Expert Answers and Solutions

Experts recommend resetting the system by cycling power and ensuring sensors are clean. For error messages, check connections and recalibrate sensors. Manual leveling is done via the control panel, overriding auto-mode. Uneven terrain can be addressed by adjusting jack extensions before auto-leveling. Regularly inspect hydraulic fluid levels and replace worn seals. Calibration should occur on level ground with the system loaded. Always refer to the manual for specific procedures to ensure optimal performance and system longevity.

The Lippert 6 Point Leveling System enhances RV stability, safety, and comfort. Its advanced features and ease of use make it a top choice for campers seeking efficiency and convenience.

12.1 Summary of Key Points

The Lippert 6 Point Leveling System offers a comprehensive solution for RV stability, combining hydraulic jacks, advanced sensors, and user-friendly controls. It ensures precise leveling, enhances safety, and improves comfort. The system’s automation features streamline the setup process, while its durability and reliability make it a long-term investment. Regular maintenance and adherence to safety guidelines are crucial for optimal performance. This system stands out for its efficiency, ease of use, and ability to handle various terrains, making it a top choice for RV enthusiasts.

12.2 Final Thoughts on the Lippert 6 Point Leveling System

The Lippert 6 Point Leveling System is a standout solution for RV owners seeking efficiency, ease, and reliability. Its advanced features, durability, and user-friendly design make it an excellent choice for ensuring a stable and comfortable camping experience. With proper care and use, this system provides long-term value and enhances overall RV functionality. It is a highly recommended investment for anyone looking to elevate their RV adventures with convenience and precision.

PDF

meco vehicle p4 manual pdf download

Welcome to the Meco Vehicle P4 Manual, your essential guide for understanding and operating your electric vehicle. This document provides detailed instructions, safety guidelines, and troubleshooting tips to ensure optimal performance and longevity of your P4 model. Designed to help you navigate installation, maintenance, and advanced features, this manual is a comprehensive resource for both new and experienced users.

1.1 Importance of the Manual for Vehicle Operation

The Meco Vehicle P4 Manual is a critical resource for safe and effective operation of your electric vehicle. It provides essential guidelines for understanding safety protocols, troubleshooting common issues, and optimizing performance. By following the manual, users can ensure compliance with warranty terms, maintain battery health, and avoid potential hazards. The document also includes detailed instructions for advanced features and customization options, enabling users to maximize their driving experience. Regularly reviewing the manual helps prevent errors and extends the vehicle’s lifespan. Whether you’re a new owner or an experienced user, this guide is indispensable for achieving optimal functionality and safety.

1.2 Overview of the Meco Vehicle P4 and Its Features

The Meco Vehicle P4 is a cutting-edge electric vehicle designed for efficiency and sustainability. It features a powerful electric motor, advanced battery technology, and a user-friendly control panel. The P4 is equipped with regenerative braking, eco-mode, and customizable settings for personalized driving experiences. Its sleek, aerodynamic design reduces energy consumption, while the spacious interior ensures comfort. The vehicle also includes smart connectivity options, enabling seamless integration with mobile devices. With its eco-friendly performance and innovative features, the Meco Vehicle P4 is an ideal choice for modern commuters seeking reliability and style. This overview highlights its key attributes, making it a versatile option for urban and suburban environments.

Key Features of the Meco Vehicle P4

The Meco Vehicle P4 offers high-performance electric propulsion, sustainable energy efficiency, and advanced technology for a smooth, user-centric driving experience, ensuring durability and reliability.

2.1 Design and Technical Specifications

The Meco Vehicle P4 features a sleek, lightweight design with durable materials, ensuring both aesthetic appeal and robust performance. Its compact frame is built for maneuverability, while the ergonomic structure enhances comfort. The vehicle is equipped with a high-efficiency electric motor, delivering smooth acceleration and consistent power output. The P4 boasts a advanced battery system, offering extended range and fast charging capabilities. Technical specifications include a top speed of 25 km/h, a range of up to 60 km on a single charge, and a load capacity of 150 kg. These features make it ideal for urban commuting and light-duty tasks, blending practicality with innovation.

2.2 Safety and Performance Standards

The Meco Vehicle P4 adheres to stringent safety and performance standards, ensuring reliability and user protection. It meets international certifications for electric vehicles, featuring advanced braking systems and stability controls. The P4 is designed with multiple safety layers, including overload protection and emergency stop functions. Performance-wise, it delivers consistent power output and optimal energy efficiency, making it suitable for various terrains. Regular safety inspections and adherence to maintenance schedules are recommended to uphold its performance standards. The vehicle’s robust construction and high-quality components ensure durability and reliability, providing users with a secure and efficient commuting experience. These standards are meticulously outlined in the manual for user reference and compliance.

How to Download the Meco Vehicle P4 Manual PDF

Visit the official Meco website, navigate to the support section, and select the P4 model to access the PDF download link for the manual.

3.1 Reliable Sources for the Manual

To ensure authenticity and safety, download the Meco Vehicle P4 Manual PDF from trusted sources. The official Meco website is the primary and most reliable source, offering direct access to the manual. Additionally, authorized dealers and distributors often provide verified copies. Be cautious of third-party websites, as they may host outdated or incorrect versions. Always verify the source’s credibility to avoid downloading malicious files. For added convenience, Meco may also provide the manual through its dedicated customer support portal. Stick to these sources to guarantee you receive the correct and up-to-date version of the manual.

3.2 Step-by-Step Download Instructions

To download the Meco Vehicle P4 Manual PDF, start by visiting the official Meco website. Navigate to the “Support” or “Downloads” section. Locate the “Meco Vehicle P4” product page and click on the “Manual” or “Documentation” link. Select the PDF format and click the download button. Wait for the file to download to your device. Ensure your internet connection is stable to avoid interruptions. Once downloaded, open the file using a PDF reader to access the manual. Always verify the file source to prevent downloading unauthorized or malicious content. The manual should be free and readily available for genuine users.

Understanding the Content of the Manual

The manual provides detailed insights into the Meco Vehicle P4’s operation, including safety guidelines, technical specifications, and troubleshooting tips. It is structured logically for easy navigation.

4.1 Structure and Organization of the Document

The Meco Vehicle P4 manual is meticulously organized to ensure easy navigation. It begins with an introduction, followed by key features, installation guides, and operational instructions. The document is divided into clear sections, such as safety precautions, maintenance schedules, and troubleshooting tips. Each chapter is further subdivided into specific topics, making it simple for users to locate information quickly. The manual includes visual aids like diagrams and charts to complement the text. A detailed table of contents and index are also provided for seamless navigation. This logical structure ensures that users can access critical information efficiently, enhancing their overall experience with the Meco Vehicle P4.

4.2 Key Sections Every User Should Review

The Meco Vehicle P4 manual contains essential sections that every user should thoroughly review. The safety precautions and warnings are critical to ensure safe operation and prevent accidents. The technical specifications and design overview provide vital details about the vehicle’s capabilities and limitations. The installation and setup guide is indispensable for proper configuration. Additionally, the maintenance and troubleshooting sections offer practical advice for upkeep and resolving common issues. Finally, the legal and compliance information outlines warranty details and regulatory requirements. Reviewing these sections ensures users understand their responsibilities and can operate the vehicle safely and effectively.

Installation and Setup Guide

The Meco Vehicle P4 Installation and Setup Guide provides step-by-step instructions to ensure a smooth setup process. Follow the guide to configure your vehicle correctly for optimal performance.

5.1 Pre-Installation Checks and Requirements

Before installing the Meco Vehicle P4, ensure all pre-installation checks are completed. Verify the vehicle is on a level surface and in park mode. Check the battery level and charge if necessary. Ensure all safety gear is worn, and the area is clear of obstacles. Review the manual for specific tools and materials required. Confirm compatibility with your device or system. Update software to the latest version if needed. Ensure proper ventilation and avoid extreme temperatures. Follow safety guidelines to prevent accidents. These steps ensure a safe and successful installation process. Always refer to the manual for detailed instructions and precautions.

5.2 Step-by-Step Installation Process

The installation of the Meco Vehicle P4 requires careful adherence to the manual. Begin by powering off the vehicle and ensuring all components are ready. Locate the installation area as specified in the manual. Connect the necessary cables and sensors, ensuring tight and secure connections. Power on the system and follow the manual’s calibration instructions. Test each component to confirm proper function. Refer to the troubleshooting section if any issues arise. Complete the installation by double-checking all connections and ensuring the system operates smoothly. Always follow the manual’s guidance for a successful setup. Proper installation is crucial for optimal performance and safety.

Operating the Meco Vehicle P4

Operating the Meco Vehicle P4 involves mastering its intuitive controls and understanding its advanced features. Start with basic functions, then explore customization options for a personalized experience. Always refer to the manual for guidance on optimizing performance and safety while driving. Regular practice ensures smooth operation and familiarity with the vehicle’s capabilities. Proper operation enhances both efficiency and enjoyment of the Meco Vehicle P4.

6.1 Basic Controls and Functions

The Meco Vehicle P4 features an intuitive control system designed for ease of operation. The primary controls include the accelerator, brakes, and steering mechanism, which are essential for basic vehicle movement. The dashboard houses a central control panel with buttons for activating lights, indicators, and other essential functions. The digital display provides real-time information such as speed, battery level, and navigation data. Understanding these fundamental controls is crucial for safe and efficient operation. Familiarize yourself with the layout and functions before use to ensure a smooth experience. Always refer to the manual for detailed instructions on operating these controls effectively.

6.2 Advanced Features and Customization Options

The Meco Vehicle P4 offers advanced features to enhance your riding experience. Customize settings such as acceleration sensitivity, braking strength, and suspension stiffness to suit your preferences. The multifunctional display allows you to toggle between modes, such as Eco, Sport, and Custom, optimizing performance for different scenarios. Additional features include customizable lighting, regenerative braking adjustment, and app connectivity for real-time data tracking. Users can also personalize the vehicle’s aesthetics with interchangeable panels and color schemes. These advanced options ensure a tailored experience, combining functionality with personal style. Always refer to the manual for detailed instructions on accessing and adjusting these features safely and effectively.

Safety Precautions and Warnings

Always wear safety gear, follow weight limits, and avoid sharp turns at high speeds. Use genuine parts and adhere to guidelines for safe and reliable operation.

7.1 Essential Safety Guidelines for Operators

Always wear approved safety gear, including a helmet and protective clothing, before operating the Meco Vehicle P4. Ensure the vehicle is on a flat surface and apply the parking brake. Conduct a pre-ride inspection of brakes, tires, and controls. Avoid sharp turns or high speeds, especially in unfamiliar terrain. Never operate the vehicle under the influence of alcohol or drugs. Keep loose clothing and long hair tied back to avoid entanglement. Ensure the vehicle is properly maintained, and only carry the recommended number of passengers. Follow all traffic laws and use hand signals for turns. Be aware of your surroundings and avoid hazards like potholes or debris.

7.2 Common Hazards and How to Avoid Them

Be cautious of slippery surfaces, as they can cause loss of traction. Reduce speed on wet or icy roads. Avoid sudden acceleration or sharp turns, which may destabilize the vehicle. Watch for uneven terrain, such as potholes or loose gravel, which can lead to skidding. Never operate the vehicle near open flames or sparks, as it may ignite flammable materials. Keep children and pets away from the vehicle while in operation. Avoid overloading the vehicle beyond its recommended capacity. Regularly inspect tires and brakes to prevent mechanical failures. Always follow traffic rules and stay alert to minimize collision risks.

Maintenance and Troubleshooting

Regular inspections and timely servicing are essential for optimal performance. Troubleshooting involves identifying and addressing issues promptly. Always refer to the manual for detailed guidance.

8.1 Regular Maintenance Schedule

The Meco Vehicle P4 manual outlines a detailed maintenance schedule to ensure optimal performance and longevity. Regular checks should be performed every 3 months or 3,000 miles, whichever comes first. This includes oil changes, battery inspections, and tire pressure checks. Additionally, the manual recommends annual inspections for brakes, suspension, and electrical systems. Failure to follow the schedule may result in reduced efficiency or premature wear. Always adhere to the manufacturer’s guidelines to maintain warranty validity and ensure safety. Proper maintenance not only enhances performance but also prevents costly repairs. Refer to the manual for a comprehensive list of time-based and usage-based maintenance intervals.

8.2 Common Issues and Their Solutions

The Meco Vehicle P4 manual addresses common issues users may encounter. Battery drain is a frequent problem, often caused by leaving headlights or electronic systems active. To resolve this, ensure all features are turned off when not in use. Faulty sensors may trigger warning lights; resetting the system or replacing the sensor typically fixes this. Software glitches can cause malfunctions, and a system reset usually resolves these. Tire pressure warnings are common due to temperature changes; check and adjust pressure as needed. For persistent issues, refer to the manual’s troubleshooting guide or contact customer support for assistance. Always follow the recommended solutions to maintain performance and safety.

Battery Care and Management

Proper battery care ensures optimal performance and longevity. Avoid extreme temperatures, keep the battery charged between 20%-80%, and store it in a cool, dry place when not in use. Regularly check connections for cleanliness and tightness to prevent drainage. Follow the manual’s charging guidelines to maintain health and avoid degradation. Always use approved chargers and adhere to safety precautions to maximize battery life and vehicle performance.

9.1 Charging Guidelines and Best Practices

Charge your Meco Vehicle P4 battery using the approved charger provided. Aim to charge it when the battery level drops below 20% to maintain longevity. Avoid overcharging; keep it between 20%-80% for optimal health. Always charge in a well-ventilated area, away from flammable materials. Use the original cable and avoid fast charging unless necessary. Monitor temperature levels; charging in extreme heat or cold can degrade the battery. If not using the vehicle for an extended period, store the battery at 50% charge. Follow the manual’s charging cycle recommendations to ensure maximum performance and lifespan.

9.2 Extending Battery Life and Performance

To maximize the lifespan and performance of your Meco Vehicle P4 battery, avoid extreme temperatures and store it in a cool, dry place when not in use. Regularly update the vehicle’s software to ensure optimized battery management. Monitor charge cycles and avoid deep discharges (below 0%) if possible. Clean the battery terminals periodically to maintain proper connections. Store the battery at 50% charge if the vehicle will be unused for extended periods. Avoid exposing the battery to physical stress or impacts. By following these guidelines, you can extend the battery’s lifespan and ensure consistent performance over time.

Legal and Compliance Information

This section outlines the legal disclaimers, warranty terms, and regulatory compliance standards for the Meco Vehicle P4, ensuring adherence to safety and operational laws and guidelines.

10.1 Warranty and Liability Disclaimers

The Meco Vehicle P4 manual outlines the warranty terms and liability disclaimers to protect both the manufacturer and users. It specifies the duration and scope of the warranty, detailing covered parts and exclusions. Users are advised to review these sections to understand their rights and limitations; The manual also includes disclaimers regarding potential damages or injuries arising from misuse or negligence. Proper adherence to the manual’s guidelines is emphasized to ensure compliance with warranty conditions. This section is essential for users to comprehend the legal framework surrounding the vehicle’s use and maintenance, ensuring transparency and accountability.

10.2 Regulatory Compliance and Certifications

The Meco Vehicle P4 adheres to stringent regulatory standards, ensuring compliance with local and international safety and environmental regulations. The manual details certifications such as ISO, CE, and UL, confirming the vehicle’s adherence to quality and safety norms. Compliance with emission standards and energy efficiency regulations is also highlighted, reinforcing the vehicle’s eco-friendly design. Users are assured that the P4 meets all necessary legal requirements, providing a safe and reliable operating experience. This section emphasizes the manufacturer’s commitment to delivering a product that not only meets but exceeds industry expectations, fostering trust and confidence among users.

Additional Resources and Support

The Meco Vehicle P4 manual provides access to dedicated customer support, including phone, email, and live chat. Online communities and forums offer additional resources for troubleshooting and tips.

11.1 Customer Service and Technical Support

The Meco Vehicle P4 manual ensures comprehensive customer service and technical support to address user inquiries and resolve issues promptly. Users can access dedicated support through multiple channels, including phone, email, and live chat; The support team is available 24/7 to provide assistance with installation, operation, and troubleshooting. Additionally, regional support centers offer localized help, ensuring a seamless experience. For complex technical issues, users can request callbacks or schedule appointments with certified professionals. The manual also includes a detailed contact directory, making it easy to connect with the right support specialists. This ensures that users receive timely and effective solutions to any challenges they encounter.

11.2 Online Communities and Forums for Users

Engaging with online communities and forums dedicated to the Meco Vehicle P4 enhances user experience and problem-solving. These platforms allow users to share insights, ask questions, and gain advice from experienced operators. Active forums often feature discussions on troubleshooting, customization, and optimal usage. Users can access tutorials, tips, and resources shared by enthusiasts and experts. Participating in these communities fosters a sense of belonging and provides peer-to-peer support. Regular updates and announcements from Meco are also shared here, keeping users informed. By joining these forums, users can maximize their understanding and enjoyment of the P4, ensuring they get the most out of their vehicle.

12.1 Summary of Key Takeaways

The Meco Vehicle P4 manual is an essential guide for optimal performance and safety. It covers installation, operation, and maintenance, ensuring users understand all features and functions. By following the manual, operators can maximize efficiency, reduce risks, and extend the lifespan of the vehicle. Key sections include safety precautions, troubleshooting, and battery care. Always refer to the manual for clarity on specific procedures. If unsure, contact customer support for assistance. Regular updates and adherence to guidelines will ensure a smooth and enjoyable experience with the Meco Vehicle P4. Safe and responsible usage is key to unlocking its full potential.

12.2 Encouragement to Follow the Manual

Adhering to the Meco Vehicle P4 manual is crucial for ensuring safety, optimal performance, and longevity of the vehicle. By following the guidelines, users can avoid potential risks and troubleshooting issues. The manual provides clear, user-friendly instructions tailored to enhance your experience. Ignoring the recommendations may lead to suboptimal functionality or even damage. Take the time to thoroughly review and apply the advice offered. Your attention to detail will result in a smoother, more efficient operation. Remember, the manual is your key resource for maximizing the capabilities of the Meco Vehicle P4. Prioritize safety and performance by adhering to its instructions diligently.

airfly instructions pdf

AirFly is an innovative wireless audio device designed to transform your audio experience. The AirFly Instructions PDF provides comprehensive guidance for setup‚ pairing‚ and troubleshooting.

1.1 What is AirFly?

AirFly is a wireless audio device designed to enhance your listening experience by streaming audio from various sources to your preferred audio outputs. It allows users to seamlessly connect their devices to speakers‚ headphones‚ or sound systems‚ offering high-quality sound transmission. With its user-friendly interface and versatile compatibility‚ AirFly simplifies audio streaming‚ making it accessible for everyone. Whether you’re streaming from a smartphone‚ tablet‚ or computer‚ AirFly ensures a stable and uninterrupted connection‚ providing an effortless way to enjoy your favorite music or podcasts wirelessly.

1.2 Brief History of AirFly

AirFly emerged as a breakthrough in wireless audio technology‚ developed to address the growing need for seamless audio streaming solutions. Originating from a vision to simplify connectivity between devices and audio outputs‚ AirFly has evolved significantly since its inception. Over the years‚ it has incorporated cutting-edge advancements to enhance performance and user experience. Today‚ AirFly stands as a reliable and innovative tool‚ widely recognized for its ability to stream high-quality audio effortlessly‚ making it a preferred choice for both casual users and audiophiles alike.

System Requirements for AirFly

AirFly requires compatible Bluetooth-enabled devices and a stable internet connection. Ensure your device supports AirFly’s software and operates on a compatible operating system for optimal performance.

2.1 Compatible Devices

AirFly is compatible with a wide range of devices‚ including smartphones‚ tablets‚ laptops‚ and smart TVs. It supports iOS‚ Android‚ Windows‚ and macOS operating systems. Ensure your device has Bluetooth 4.0 or higher for seamless connectivity. Additionally‚ AirFly works with popular audio devices like headphones and speakers. For older devices without Bluetooth‚ a compatible adapter may be required. Always check the AirFly Instructions PDF for a detailed list of supported devices and their specific requirements.

2.2 Software and Browser Requirements

For optimal performance‚ ensure your device has compatible software and browsers. AirFly supports Chrome‚ Firefox‚ Safari‚ and Edge browsers (versions 70+); Install the latest AirFly plug-in from the official website. Ensure your operating system is up-to-date (Windows 10+‚ macOS High Sierra+‚ Android 8.0+). For troubleshooting‚ disable browser extensions temporarily. Always refer to the AirFly Instructions PDF for detailed software and browser compatibility. Regular updates are crucial for seamless functionality and security.

Downloading and Installing AirFly Instructions PDF

This section provides a clear guide on how to obtain the AirFly Instructions PDF. Learn how to access‚ save‚ and organize the document for easy reference.

3.1 Steps to Download the AirFly Instructions PDF

Downloading the AirFly Instructions PDF is a straightforward process. Visit the official AirFly website‚ navigate to the support section‚ and locate the “Downloads” tab. Select the AirFly Instructions PDF from the available resources. Click the download link to begin the process. Ensure you have a stable internet connection for a smooth download. Once completed‚ save the PDF to a convenient location on your device. This guide is available in multiple formats‚ including printable versions‚ to suit your needs. Open the file to access detailed setup and usage instructions.

3.2 Installation Guide for AirFly Software

Install AirFly software by launching the downloaded installer and following on-screen instructions. Accept the terms and select installation options. Choose a destination folder and complete the setup. Ensure your device meets system requirements before installation. Restart your device after installation for optimal performance. For troubleshooting‚ refer to the AirFly Instructions PDF. The software is compatible with both Windows and macOS. After installation‚ open the AirFly application to begin configuring your device. If prompted‚ update the software to the latest version for enhanced functionality.

Setting Up AirFly for the First Time

Power on AirFly and put it in pairing mode. Connect to your device via Bluetooth or Wi-Fi. Follow the AirFly Instructions PDF for a seamless setup experience.

4.1 Initial Configuration

Begin by powering on your AirFly device and ensuring it is in pairing mode. Check for LED indicators or sounds confirming readiness. Open your device’s Bluetooth or Wi-Fi settings and select AirFly from the available options. Once connected‚ launch the AirFly app or web interface to complete the initial setup. Log in or create an account if required. Follow the on-screen prompts to select your AirFly device from the list. Customize basic settings like device name or audio preferences. Finally‚ review and confirm your configuration to ensure proper functionality. Refer to the AirFly Instructions PDF for detailed guidance.

4.2 Pairing AirFly with Your Device

Pairing AirFly with your device is straightforward. Ensure AirFly is turned on and in pairing mode‚ indicated by a flashing LED or sound. Open your device’s Bluetooth or Wi-Fi settings and locate AirFly in the list of available devices. Select AirFly to initiate the pairing process. If prompted‚ enter the passcode provided in the AirFly Instructions PDF. Once connected‚ a confirmation message or sound will indicate successful pairing. For wired connections‚ simply plug AirFly into your device’s audio jack. Refer to the PDF for troubleshooting tips if pairing fails.

Navigating the AirFly Dashboard

The AirFly Dashboard offers a user-friendly interface for managing settings‚ monitoring connections‚ and accessing advanced features‚ ensuring seamless control over your audio experience.

5.1 Overview of the Dashboard Interface

The AirFly Dashboard interface is designed to be intuitive and user-friendly‚ featuring a clean layout with easily accessible controls. The dashboard is divided into key sections‚ including device status‚ connectivity options‚ and audio settings. Users can view real-time updates on battery life‚ connected devices‚ and playback status. The interface also provides quick access to advanced features like multi-device connectivity and low latency mode. Customization options allow users to tailor settings to their preferences‚ ensuring a personalized experience. The dashboard’s streamlined design makes it easy to navigate and manage AirFly’s functionalities efficiently.

5.2 Customizing Settings

Customizing AirFly settings allows users to tailor their experience to meet specific needs. The dashboard offers options to adjust audio quality‚ set device priority‚ and enable advanced features like low latency mode. Users can also personalize connectivity preferences‚ such as preferred devices and automatic reconnection settings. Additionally‚ the interface provides options to customize notification alerts and update frequencies. These customization features ensure a seamless and personalized experience‚ allowing users to optimize AirFly’s performance according to their preferences and usage patterns. The intuitive design makes it easy to explore and adjust settings without complexity.

Troubleshooting Common Issues

Troubleshooting Common Issues with AirFly is essential for optimal performance. This section addresses frequent problems like connectivity issues and audio delays‚ providing practical solutions and quick fixes.

6.1 Resolving Connection Problems

Connection issues with AirFly can be frustrating‚ but the AirFly Instructions PDF offers practical solutions. Common problems include weak Wi-Fi signals‚ outdated firmware‚ or incorrect Bluetooth settings. Restarting your device‚ ensuring stable internet‚ and checking for firmware updates can often resolve these issues. Additionally‚ physical obstructions or interference from other devices may disrupt connectivity. The PDF provides step-by-step guidance to diagnose and fix these problems‚ ensuring seamless audio streaming and device pairing. Refer to the troubleshooting section for detailed solutions to restore your AirFly’s performance.

6.2 Fixing Audio Playback Issues

Audio playback issues with AirFly can be addressed by checking volume settings‚ ensuring proper device pairing‚ and verifying audio output selection. If no sound is heard‚ restart both AirFly and your connected device. Distorted audio may indicate interference; try moving devices closer or switching to a wired connection. Delayed or dropped audio could result from outdated firmware or weak Wi-Fi signal. Refer to the AirFly Instructions PDF for detailed troubleshooting steps‚ including resetting the device or reinstalling software to restore optimal audio performance and eliminate playback disruptions.

Advanced Features of AirFly

AirFly offers advanced features like multi-device connectivity and low latency mode‚ enhancing your wireless audio experience with seamless performance and superior sound quality.

7.1 Using Multi-Device Connectivity

AirFly’s multi-device connectivity allows seamless pairing with up to five devices at once; This feature enhances flexibility‚ enabling easy switching between smartphones‚ tablets‚ or laptops. Perfect for shared environments‚ it ensures uninterrupted audio streaming. The AirFly Instructions PDF details how to configure this setting‚ ensuring a smooth and efficient user experience. Multi-device connectivity is ideal for households or workplaces‚ providing convenience and reducing the need for frequent pairing and unpairing processes.

7.2 Enabling Low Latency Mode

AirFly’s Low Latency Mode minimizes audio delay‚ ensuring synchronized sound for activities like gaming or video streaming. To enable this feature‚ access the AirFly app‚ navigate to Settings‚ and toggle the Low Latency option. The AirFly Instructions PDF provides detailed steps for activation. This mode prioritizes real-time audio transmission‚ reducing lag and enhancing overall performance. It is particularly beneficial for users seeking immersive experiences without delays. Follow the PDF guide to optimize your setup and enjoy seamless audio output.

Tips for Optimal AirFly Performance

Maximize your AirFly experience with essential tips on maintaining battery health and ensuring firmware updates for uninterrupted‚ high-quality audio streaming and connectivity.

8.1 Maintaining Battery Health

To ensure optimal performance‚ charge AirFly using the provided cable and avoid extreme temperatures. Keep the battery between 20% and 80% charge to prevent degradation. Store the device in a cool‚ dry place when not in use. Avoid overcharging‚ as this can reduce battery lifespan. Regularly update firmware to improve energy efficiency. Clean the charging port to maintain proper connectivity. By following these guidelines‚ you can extend the life of your AirFly’s battery and enjoy uninterrupted audio streaming.

8.2 Updating Firmware Regularly

Regular firmware updates are essential for optimal AirFly performance. These updates enhance functionality‚ fix bugs‚ and improve compatibility. To update‚ connect AirFly to your device‚ open the AirFly app‚ and follow the on-screen instructions. Ensure a stable internet connection during the process. Updates may take a few minutes; avoid interrupting the device. Keep your AirFly software up-to-date to access new features and maintain seamless audio streaming. Refer to the AirFly Instructions PDF for detailed steps and troubleshooting tips if needed.

Security Considerations

Ensure your AirFly device and connection remain secure by enabling encryption‚ setting strong passwords‚ and using trusted Wi-Fi networks to protect against unauthorized access and data breaches.

9.1 Protecting Your AirFly Device

To safeguard your AirFly device‚ use a protective case and avoid exposing it to extreme temperatures or moisture. Enable password protection for added security and regularly update firmware to patch vulnerabilities. Store the device securely when not in use and avoid sharing access with unauthorized individuals. Additionally‚ ensure physical security by keeping it out of reach of children and pets. Regularly inspect for damage and avoid using damaged charging cables; By following these steps‚ you can ensure your AirFly device remains secure and functions optimally.

9;2 Securing Your Wi-Fi Connection

To secure your Wi-Fi connection for your AirFly device‚ follow these organized steps:
Use Strong and Unique Passwords: Replace the default Wi-Fi password with a strong‚ unique password to enhance security.

Enable Latest Encryption: Use WPA3 encryption if available; it offers the highest security. If not‚ use WPA2.

Enable Firewall: Activate the firewall on your router to block unauthorized access.
Consider SSID Hiding: While not foolproof‚ hiding your SSID can make your network less visible to potential intruders.

Set Up MAC Address Filtering: Allow only specific devices to connect by enabling MAC address filtering.

Regularly Update Firmware: Keep your router’s firmware updated to patch security vulnerabilities.
Consider Using a VPN: Enhance security and privacy by using a VPN‚ though it may affect internet speed.

Prioritize these steps‚ starting with critical ones like changing passwords and enabling encryption‚ then proceed to additional measures for enhanced security. Consult your router’s manual or manufacturer’s website for specific instructions.

Frequently Asked Questions

Discover answers to common queries about AirFly‚ including troubleshooting‚ compatibility‚ and optimal usage‚ ensuring a seamless experience with your device.

10.1 General Queries

This section addresses common questions about AirFly‚ such as device compatibility‚ pairing issues‚ and battery life. It also provides clarity on how to access the AirFly Instructions PDF and troubleshoot basic connectivity problems. Users can find answers to frequently asked questions about setup‚ performance‚ and maintenance. Additionally‚ it covers topics like resetting the device‚ updating firmware‚ and understanding LED indicators. These queries are designed to help users resolve issues quickly and ensure a smooth experience with their AirFly device.

10.2 Technical Support Contact Information

For further assistance‚ contact AirFly Support at support@airfly.com or call +1-800-AIRFLY-1. Live chat is available on the official website. Office hours are Monday-Friday‚ 9 AM-5 PM EST. Visit airfly.com/contact for more details. Ensure to include your device serial number and a detailed description of your issue for prompt resolution. Refer to the AirFly Instructions PDF for troubleshooting steps before reaching out.

men fashion guide

A comprehensive guide to men’s fashion, exploring style, trends, and essential items for a polished wardrobe. Discover classic elegance and contemporary looks tailored for every occasion.

Understanding the Basics of Men’s Style

Mastering men’s style begins with understanding fit, quality, and versatility. Classic essentials like tailored suits, leather jackets, and well-fitted denim form the foundation of a timeless wardrobe. Focus on clean lines, high-quality fabrics, and harmonious color palettes to create polished looks. Emphasize comfort without compromising on structure, ensuring each piece flatters your physique. By balancing modern trends with enduring elegance, you can craft a versatile wardrobe that suits every occasion, from formal events to casual gatherings. Confidence and attention to detail are the cornerstones of authentic style.

Why Fashion Matters for Men

Fashion is a powerful tool that communicates individuality, professionalism, and confidence. For men, it transcends mere clothing, serving as a non-verbal expression of character and ambition. A well-curated wardrobe can enhance career opportunities, make a lasting impression in social settings, and boost self-esteem. Fashion also offers a creative outlet, allowing men to explore personal style and cultural influences. By embracing fashion, men can convey their values and aspirations, making it an integral part of modern identity and personal growth. Style speaks louder than words, shaping perceptions and opportunities.

2023 Men’s Fashion Trends

2023 saw a resurgence of 90s and Y2K influences, with baggy jeans, oversized clothing, bold patterns, neon colors, utility jackets, and chunky sneakers dominating the fashion scene.

Power Suits and Tailored Elegance

Power suits made a bold comeback in 2023, blending 80s-inspired broad shoulders with modern streamlined cuts. Tailored elegance emphasizes precision fit, exuding confidence and authority. Luxurious fabrics like wool and cashmere dominate, while subtle patterns such as pinstripes and Checks add sophistication. A well-tailored suit remains a wardrobe cornerstone, effortlessly transitioning from boardrooms to formal events. Paired with crisp shirts and sleek accessories, it embodies timeless style and refinement, proving that tailored elegance is a cornerstone of modern men’s fashion.

Athleisure and Streetwear Influence

Athleisure and streetwear continue to dominate men’s fashion, blending comfort with urban style. Key pieces like oversized hoodies, graphic tees, and sleek sneakers have become wardrobe staples. The trend emphasizes relaxed fits and bold designs, allowing for personal expression. Streetwear’s influence is seen in logo-heavy apparel and statement accessories, while athleisure focuses on functionality without compromising on aesthetics. This fusion has redefined casual wear, making it both trendy and practical for everyday looks, reflecting the cultural shift towards comfort and self-expression in fashion.

Sustainable Fashion for Men

Sustainable fashion for men focuses on eco-conscious choices, prioritizing ethical practices and environmental impact. Brands are embracing organic cotton, recycled materials, and responsible production methods. Second-hand shopping and clothing rentals are gaining popularity as alternatives to fast fashion. Investing in timeless, high-quality pieces reduces waste and promotes longevity. Men are increasingly supporting transparent brands that align with their values, creating a more sustainable future for fashion while maintaining style and sophistication.

Autumn/Winter 2023 Trends

Autumn/Winter 2023 Trends blend sophistication with practicality, featuring earthy tones, oversized coats, chunky knitwear, and leather accessories. Functional details and layered looks dominate the season’s style.

Officecore: The Rise of Professional Styles

Officecore redefines modern professionalism, blending sharp tailoring with contemporary flair. Crisp suits in neutral tones, paired with slim-fit shirts, create a polished look. Contrasting stitching and utility-inspired details add a modern edge, while layering with blazers or cardigans enhances versatility. Accessories like patterned ties and minimalist watches elevate the ensemble. This trend emphasizes clean lines, premium fabrics, and attention to detail, making office attire both stylish and sophisticated for the modern man.

Utility Jackets and Functional Design

Utility jackets have become a cornerstone of modern men’s fashion, blending practicality with style. Featuring multiple pockets, durable fabrics, and versatile designs, these jackets are perfect for both casual and semi-formal settings. Paired with cargo pants or combat boots, they create a rugged yet fashionable look. Functional details like buckles, zippers, and reinforced stitching add to their appeal. This trend emphasizes comfort and utility without compromising on aesthetics, making it a go-to choice for everyday wear and outdoor activities.

Chunky Footwear: Loafers and Boots

Chunky footwear, including loafers and boots, has emerged as a dominant trend in men’s fashion. Known for their thick soles and robust designs, these styles add a bold statement to any outfit. Loafers offer a sleek yet sturdy option, while boots provide a rugged edge. Both are crafted from premium materials like leather and suede, ensuring durability and comfort. Pairing chunky footwear with slim-fit pants or jeans creates a balanced look, making them versatile for both casual and dressy occasions. This trend emphasizes practicality without sacrificing style.

Spring/Summer 2024 Trends

Pastel colors, lightweight fabrics, and oversized silhouettes dominate the season. Utility details and earthy tones add functionality, while relaxed fits and functional elements create a fresh, modern aesthetic.

Pastel Colors and Lightweight Fabrics

Pastel colors like lavender, peach, and mint are making a strong statement in Spring/Summer 2024. Lightweight fabrics, such as linen, cotton, and silk, dominate, offering breathability and comfort. These soft hues create a fresh, modern aesthetic, perfect for warm weather.
Pair pastel shirts with neutral tones for a balanced look or go bold with head-to-toe pastel ensembles. Lightweight fabrics ensure effortless style, while the colors add a touch of sophistication to any outfit, blending seamlessly into the season’s relaxed yet elegant vibe.

Relaxed Fit: Balancing Comfort and Style

Relaxed-fit clothing is a key trend, blending comfort with sophistication. Oversized shirts, wide-leg trousers, and loose-fitting jackets create a laid-back yet stylish look.
These pieces are perfect for casual outings or layering, offering ease without compromising on fashion. Fabric quality and subtle details ensure the outfit remains polished, making relaxed fits versatile for everyday wear or dressed-up occasions, proving comfort and style can coexist effortlessly in modern men’s fashion.

Accessories: Hats, Sunglasses, and Bags

Accessories are essential for completing a man’s outfit. Hats, such as Panama hats or baseball caps, add personality and protection. Sunglasses are both functional and stylish, with aviators and wayfarers remaining timeless choices. Bags, like leather totes or backpacks, offer practicality while elevating your look. These elements not only enhance comfort but also express individuality, allowing men to personalize their style effortlessly while staying on-trend in 2024. Quality accessories make a statement and are worth investing in for long-term use.

Essential Wardrobe Items

A well-rounded wardrobe starts with classic suits, well-tailored blazers, and crisp white shirts. Dark denim jeans and high-quality leather jackets add versatility and timeless style.

Classic Suits: A Timeless Investment

A classic suit is the cornerstone of any man’s wardrobe, offering unmatched versatility and sophistication. A well-tailored suit in navy or charcoal is essential for formal events, business meetings, or special occasions. It exudes confidence and professionalism, making it a worthwhile investment. Pair it with a crisp shirt and tie for a polished look or opt for a more modern, minimalist style. The right fit is key, ensuring a sharp, put-together appearance. A classic suit transcends trends, remaining relevant for years to come.

Leather Jackets: Adding Edge to Your Look

A leather jacket is a versatile and timeless piece that instantly adds edge to any outfit. From biker to bomber styles, it pairs perfectly with jeans for a casual look or layered over a suit for a modern twist. The rugged texture and classic design make it a standout accessory. Invest in high-quality leather for durability and a polished finish. Accessorize with boots or a scarf to complete the ensemble, ensuring a bold yet sophisticated appearance that elevates your personal style.

Denim Jeans: Fit and Style Guide

Denim jeans are a wardrobe staple, offering unparalleled versatility. The key to styling lies in the fit—slim, straight, or relaxed—each catering to different body types. Pair dark washes with dress shirts for a refined look or opt for light washes with graphic tees for casual outings. Distressed or ripped designs add edge, while classic styles remain timeless. Ensure proper care to maintain quality, and experiment with layering to elevate your denim looks. The right pair can seamlessly transition from day to night, making it a foundational piece in men’s fashion.

Accessories in Men’s Fashion

Accessories elevate outfits, adding personality and polish. From watches to wallets, belts to bags, these details refine a man’s style, completing his look with confidence.

Watches: A Statement of Sophistication

A watch is more than a timepiece; it’s a symbol of elegance and refinement. Whether leather-strapped or metallic, it adds sophistication to any outfit. Classic designs exude timeless charm, while modern smartwatches blend style with functionality. A well-chosen watch complements formal attire or casual wear, reflecting the wearer’s personality and attention to detail. Investing in a quality timepiece enhances a man’s overall aesthetic, making it a standout accessory in his wardrobe. It’s a subtle yet powerful way to convey style and confidence effortlessly.

Bags: From Backpacks to Tote Bags

Bags are essential accessories that combine practicality with style. Backpacks offer versatility, suitable for casual outings or work, while tote bags provide a minimalist yet functional option. Leather backpacks exude sophistication, pairing well with formal attire, whereas nylon totes are ideal for everyday use. Both styles enhance a man’s outfit, offering storage without compromising aesthetics. Whether for utility or fashion, bags like these are must-haves in a modern man’s wardrobe, blending seamlessly into his lifestyle for a polished, put-together look.

Footwear: Dress Shoes, Sneakers, and Boots

Footwear is a cornerstone of men’s fashion, completing every outfit. Dress shoes, such as oxfords and loafers, are ideal for formal events, offering timeless elegance. Sneakers have evolved into versatile wardrobe staples, suitable for casual to semi-formal settings. Boots, whether Chelsea or combat styles, add rugged charm and versatility. Each category reflects personal style while catering to different occasions. With trends leaning toward chunky soles and sleek designs, the right footwear choice elevates a man’s overall look, ensuring both comfort and sophistication in any setting.

Grooming and Personal Style

Grooming and personal style are pivotal for a polished look. They enhance confidence, reflecting individuality and attention to detail, blending skincare, fragrance, and tailored aesthetics seamlessly.

Skincare Routine for Men

A consistent skincare routine is essential for maintaining healthy, confident skin. Start with a gentle cleanser to remove dirt and oil, followed by a hydrating moisturizer. Sunscreen is crucial for daily protection against UV damage. Exfoliate once or twice a week to remove dead skin cells and improve texture. Using products with natural ingredients like hyaluronic acid or niacinamide can enhance hydration and reduce blemishes. A well-groomed face complements any outfit, ensuring a polished and put-together appearance. Consistency is key to achieving and maintaining a clear, radiant complexion.

Hairstyles: Trends and Maintenance

Current men’s hairstyle trends include undercuts, fades, and textured cuts, offering versatility and modern appeal. Longer styles, like pompadours or shaggy looks, are also popular, especially when paired with beards. Maintenance is key: regular trims keep styles fresh, while products like pomades or creams help define and hold the look. Balancing style with practicality ensures a sharp appearance without constant upkeep. These trends reflect a blend of sophistication and casual ease, making them suitable for various lifestyles and preferences.

The Importance of Fit in Clothing

A well-fitted wardrobe is the cornerstone of great style, enhancing both confidence and aesthetics. Clothing that skims the body creates a polished, put-together look, while poor fit can detract from even the most expensive pieces. Tailoring is key to ensuring garments flatter your frame, whether it’s slimming shoulders or elongating legs. Prioritize quality over quantity, investing in items that align with your body type. A good fit not only elevates your appearance but also ensures comfort and longevity of your wardrobe essentials.

Sustainable Men’s Fashion

Sustainable men’s fashion focuses on eco-friendly materials, ethical practices, and timeless designs. Brands are embracing organic cotton, recycled textiles, and second-hand options to reduce environmental impact while maintaining style.

Eco-Friendly Materials and Brands

Eco-friendly materials like organic cotton, recycled polyester, and Tencel are revolutionizing men’s fashion. These sustainable fabrics reduce environmental impact while maintaining quality and style. Brands are increasingly adopting ethical practices, such as using biodegradable dyes and minimizing waste. Additionally, many labels now prioritize transparency in their supply chains, ensuring fair labor practices. By choosing eco-conscious brands, men can align their wardrobe choices with environmental values, making fashion both stylish and responsible. This shift supports a greener future while keeping men looking sharp and modern.

Second-Hand Shopping: A Stylish Option

Second-hand shopping is becoming a go-to for men seeking unique, affordable, and sustainable style. Thrift stores, online marketplaces, and consignment shops offer a wide range of high-quality, pre-owned items. This option reduces waste and gives new life to timeless pieces. Men can discover vintage gems or barely used designer items at a fraction of the cost. It’s a practical way to refresh your wardrobe while supporting eco-friendly fashion. Plus, it allows for creative experimentation with different styles and eras, making your look truly one-of-a-kind.

Investing in Quality Over Quantity

Investing in quality over quantity is a cornerstone of timeless men’s fashion. Instead of accumulating fast fashion, focus on purchasing fewer, well-crafted items that stand the test of time. High-quality materials and construction ensure durability and a polished appearance. This approach reduces clutter in your wardrobe and elevates your personal style. By prioritizing craftsmanship, you create a collection of essentials that exude sophistication and confidence, making every piece a worthwhile investment in your long-term fashion journey.

Future of Men’s Fashion

The future of men’s fashion emphasizes innovation, inclusivity, and sustainability. Technological advancements in fabrics and gender-neutral designs are reshaping traditional norms, offering a modern, versatile approach to style.

Expert Predictions for Upcoming Trends

Experts predict a strong focus on bold patterns, oversized silhouettes, and utility-inspired designs in men’s fashion. Sustainable materials and gender-neutral styles will dominate, reflecting a shift toward inclusivity and eco-consciousness. Additionally, the integration of technology, such as wearable tech and adaptive fabrics, is expected to redefine modern menswear, blending functionality with high-end aesthetics for a futuristic yet practical approach to style.

Blurring the Lines: Gender-Neutral Fashion

Gender-neutral fashion is redefining traditional norms, offering versatile styles that transcend gender boundaries. Oversized shirts, wide-leg trousers, and fluid silhouettes are gaining popularity, encouraging self-expression and inclusivity. This trend promotes comfort and individuality, allowing men to explore softer textures and pastel hues while maintaining a modern aesthetic. Brands are embracing unisex designs, creating collections that cater to all identities. The movement not only challenges stereotypes but also aligns with a growing demand for sustainability, encouraging a shared wardrobe and minimizing waste.

Technology in Fashion: Innovative Fabrics

Technology is revolutionizing men’s fashion through cutting-edge fabrics that blend style and functionality. Performance materials like moisture-wicking textiles and breathable membranes are becoming staples in modern wardrobes. Sustainable fabrics, such as recycled polyester and plant-based Tencel, are gaining traction. Smart fabrics with temperature-regulating properties are also emerging, offering comfort in varying climates. These innovations cater to the demands of a dynamic lifestyle, ensuring men can stay stylish while benefiting from advanced fabric technology designed for both performance and sustainability.

Elevate your style by embracing confidence and authenticity. Invest in quality, stay informed about trends, and prioritize self-expression to create a wardrobe that reflects your true self.

Final Tips for Elevating Your Style

To elevate your style, start by identifying what works best for your body type and personal preferences. Focus on high-quality, well-fitted clothing that aligns with your lifestyle.
Accessorize thoughtfully, as small details like watches or leather bags can enhance your look.
Don’t overlook grooming; a polished appearance complements any outfit.
Stay updated on trends but prioritize timeless pieces.
Most importantly, own your style with confidence—it’s the ultimate fashion statement.

Staying Confident and Authentic in Fashion

Confidence is the cornerstone of great style, as it transforms any outfit into a statement of self-expression.
Embrace your individuality and avoid conforming to trends that don’t resonate with you.
Authenticity in fashion means staying true to your personality and values while exploring your wardrobe choices.
OWN your look, whether it’s bold, minimalist, or somewhere in between.
Remember, true style is about expressing who you are, not just following the crowd.
Confidence and authenticity are the ultimate fashion statements.

world of warcraft discipline priest guide

Welcome to the Discipline Priest guide for World of Warcraft: The War Within Patch 11.2! This comprehensive guide will help you master the class, covering talents, rotations, and strategies for both new and experienced players. Learn how to excel in PvE content with a focus on absorb mechanics and cooldown management.

Overview of the Discipline Priest

The Discipline Priest is a unique healer specializing in absorb mechanics, using spells like Power Word: Shield and Evangelism to prevent damage rather than react to it. While they have lower direct healing output compared to other healers, their ability to mitigate incoming damage makes them invaluable in high-stakes content. Discipline Priests excel in both PvE and PvP, offering a blend of survivability and strategic depth. This guide explores their strengths, optimal playstyle, and how to maximize their healing potential in various game modes.

Why Play a Discipline Priest?

Discipline Priests offer a rewarding playstyle focused on proactive healing and damage mitigation. Their unique absorb mechanics provide a strategic edge, especially in high-damage scenarios. For players who enjoy anticipating and preventing damage rather than reacting to it, Discipline Priests are both challenging and satisfying; With strong mobility and utility, they excel in PvE and PvP, making them a versatile choice for any healer looking to master a distinct and impactful role in their group or raid.

Getting Started: Basic Concepts

Discipline Priests rely on absorb mechanics to prevent damage rather than heal after it’s dealt. Key abilities like Power Word: Shield and Flash Heal form the foundation of your toolkit. Understanding how to manage cooldowns and prioritize targets is essential. Atonement, a unique mechanic, allows you to heal allies by dealing damage to enemies. This section covers the core principles of the class, helping you grasp the fundamentals of absorb-based healing and mana management. Start here to build a strong foundation for mastering the Discipline Priest.

General Information

Discipline Priests are a unique healing specialization focused on absorb mechanics and proactive damage prevention. They excel in both PvE and PvP content, offering versatile utility and strong single-target healing. This section provides an overview of the class, its playstyle, and what makes Discipline Priests distinct in World of Warcraft.

Frequently Asked Questions

  • Q: What is the primary role of a Discipline Priest?

    A: Discipline Priests focus on absorb healing, preventing damage through shields and proactive healing.
  • Q: Is Discipline Priest easy to play?

    A: Discipline requires coordination and planning, making it challenging but rewarding for experienced players.
  • Q: Can Discipline Priests heal in raids?

    A: Yes, they excel in raids with strong single-target and group absorb mechanics.
  • Q: What stats should I prioritize?

    A: Focus on Intellect, Mastery, and Critical Strike for optimal performance.

Discipline Priest in Patch 11.2

In Patch 11.2, Discipline Priests received balance adjustments to their absorb-based healing, enhancing Power Word: Shield and Atonement effectiveness. Mana efficiency improvements make sustained healing more manageable, while cooldown reductions on key abilities like Rapture provide greater flexibility in high-intensity scenarios. These changes solidify Discipline Priests as a strong choice for both PvE and PvP, with absorbs playing a central role in their kit. Players can expect smoother gameplay and increased viability in raid and dungeon content. For the latest updates, refer to Blizzard’s official patch notes or community guides.

The Role of Absorb-based Healing

Absorb-based healing is a cornerstone of the Discipline Priest playstyle, focusing on preventing damage rather than reactive healing. Abilities like Power Word: Shield and Atonement create protective barriers, reducing incoming harm. This mechanic excels in predictable damage scenarios, such as raids and dungeons, where absorbs can be applied preemptively. Properly managing absorbs requires anticipation of damage patterns and strategic use of cooldowns like Rapture. This approach minimizes overhealing and maximizes efficiency, making Discipline Priests invaluable in group content.

Race and Faction Choices

Choosing the right race and faction enhances your Discipline Priest experience. Blood Elves bring strong racial traits for mana management, while Night Elves offer increased stamina.

Blood Elf vs. Night Elf vs. Other Races

Blood Elves offer Arcane Affinity and Mana Tap, enhancing spellcasting and mana management. Night Elves provide increased stamina and Shadowmeld for stealth. Other races, like Undead or Draenei, offer unique utilities but lack direct healing benefits. Blood Elf and Night Elf are optimal due to their racial traits, but others can still perform well. Ultimately, race choice depends on playstyle and faction preferences, as no single race drastically outperforms others for Discipline Priests.

Faction-specific Benefits

Faction-specific benefits in World of Warcraft provide unique traits and abilities tailored to your Discipline Priest. For example, Blood Elves gain Arcane Acuity, increasing spellcasting precision, while Night Elves benefit from Shadowmeld for enhanced stealth. Undead Priests can use Will of the Forsaken to break fears, and Draenei gain Gift of the Naaru, boosting healing output. These racial traits offer situational advantages, enhancing your gameplay experience in PvE or PvP content; Choose a faction that aligns with your playstyle for optimal results.

Leveling Guide

Discipline Priests excel at leveling with strong solo capabilities and versatile gameplay. Use Shadowform for increased damage and Power Word: Shield for efficient healing in dungeons or quests.

Optimal Leveling Strategy

Leveling a Discipline Priest efficiently requires balancing healing and damage. Use Power Word: Shield to prevent damage and Shadow Mend for burst healing. In dungeons, focus on healing, while solo questing benefits from Shadowform for damage; Manage mana by using Power Word: Radiance for AoE healing and Rapture to regenerate mana. Prioritize questing in zones with high mob density to maximize healing opportunities. Use cooldowns like Preacher’s Vigor to enhance efficiency. This approach ensures smooth progression and effective gameplay.

Questing as Shadow vs. Discipline

When questing, playing as Shadow is generally more efficient for solo leveling due to its focus on dealing damage rather than healing. Shadowform increases damage output, making it ideal for killing mobs quickly. Discipline, while powerful in groups, is less optimal for solo questing as its strength lies in healing and absorb mechanics. However, Discipline’s Power Word: Shield can help manage aggro and reduce damage taken. For solo play, Shadow’s damage output is preferred, while Discipline shines in group content.

Dungeon Leveling Tips

In dungeons, Discipline Priests excel at mitigating damage through absorbs and proactive healing. Use Power Word: Shield on the tank to reduce incoming damage and generate Holy Power. Flash Heal and Renew are essential for spot healing, while Power Word: Barrier can prevent wipes during heavy damage phases. Position yourself near the tank to avoid unnecessary damage and ensure quick access to the group. Use Fade to reduce aggro and maintain focus on healing. Efficient mana management is key to sustained throughput in fast-paced dungeon content.

Talent Trees

Talents for Discipline Priests are allocated to enhance absorb mechanics and mana efficiency. Popular builds focus on maximizing shields and healing output through key abilities.

PvE Talent Build for Patch 11.2

The PvE talent build for Discipline Priests in Patch 11.2 focuses on maximizing absorb healing and mana efficiency. Key talents include Power Word: Shield, Rapture, and Evangelism to enhance Atonement healing. Spirit Shell and Preacher’s Word improve survivability and throughput. Shining Force adds crowd control utility, while Lenience boosts absorb effectiveness. This build ensures strong, consistent healing output while maintaining mana sustainability for raids and dungeons. Optimize your tree to balance absorb strength and cooldown management for peak performance in high-end content.

PvP Talent Differences

In PvP, Discipline Priests prioritize survivability and crowd control. Talents like Phantasm and Silence provide mobility and interrupt options. Divine Aegis enhances healing throughput, while Power Word: Shield remains a staple for protection. Unlike PvE, PvP builds often skip Rapture in favor of Preacher’s Word for consistent healing. Focus on talents that improve mana efficiency and control, as PvP demands quick reactions and sustained pressure. This build emphasizes adaptability and survivability in fast-paced arenas and battlegrounds.

Explanation of Key Talents

Discipline Priests rely on talents like Rapture, which enables reactive healing and enhances Power Word: Shield. Evangelism and Atonement form the core of their damage-healing synergy, allowing them to heal through dealing damage. Preacher’s Word ensures consistent healing output, while Divine Aegis amplifies absorbs. These talents define the Discipline Priest’s unique playstyle, blending proactive and reactive healing with offensive contributions. Mastering them is key to excelling in both PvE and PvP content.

Professions

Professions like Tailoring provide powerful pre-raid gear and materials for enchants. Engineering offers unique gadgets and stats, while Enchanting enhances equipment. These boost effectiveness significantly.

Best Professions for Discipline Priests

Tailoring is highly recommended for Discipline Priests, as it provides access to powerful spellthread and a PvP cloak enchant. Enchanting is another excellent choice, offering enhanced gear enchants like Spellpower and Haste. Engineering can also be beneficial, providing unique gadgets and additional stats. These professions complement the priest’s healing capabilities and enhance overall performance in both PvE and PvP content.

Engineering and Other Useful Professions

Engineering is a versatile profession for Discipline Priests, offering unique utility through gadgets like Jeeves for portable repairs and Nitro Boosts for increased run speed. Other useful professions include Herbalism, which provides materials for potions and flasks, and Alchemy, allowing you to craft powerful potions like Master Mana Potion for sustained healing in raids. These professions complement your healing role and enhance your overall gameplay efficiency in both PvE and PvP scenarios.

Stats and Gearing

For Discipline Priests, Intellect and Spirit are crucial, as they enhance spell power and mana regeneration. Mastery further strengthens absorb effects, optimizing your healing efficiency in raids and dungeons.

Stat Prioritization

For Discipline Priests, Intellect is the primary stat, boosting spell power and overall healing output. Spirit is crucial for mana regeneration, ensuring sustained healing in long encounters. Mastery enhances absorb effects, making it essential for optimal damage mitigation. Critical Strike and Haste are secondary stats, with Critical Strike improving heal effectiveness and Haste increasing cast speed. Balance these stats to maintain a mix of throughput, survivability, and mana efficiency for consistent performance in raids and dungeons; Proper stat prioritization is key to maximizing your healing potential as a Discipline Priest.

Best in Slot Gear for Patch 11.2

In Patch 11.2, Discipline Priests should prioritize Mythic raid gear for optimal performance. The headpiece and chestplate from the latest raid tier are crucial, offering high intellect and mastery. Crafting or upgrading gear with high item level is essential for maximizing absorb effectiveness. Additionally, seek trinkets that provide consistent healing or absorb boosts. Don’t overlook weapon enchants and gems like Mastery of the Elements to further enhance your healing output and survivability in raids and dungeons.

Gearing Strategies

Focus on acquiring gear with high intellect and mastery to enhance absorbs and healing output. Prioritize Mythic+ dungeons for initial gearing, then progress to raid content. Craft or upgrade pieces to maintain a high item level, ensuring consistency across your set. Weapon enchants like Enchanted: Draconic and gems like Mastery of the Elements are crucial. Regularly check the Auction House for upgrades and aim to replace lower item-level pieces as soon as possible to maintain optimal performance in raids and dungeons.

Rotation and Cooldowns

Focus on using Shadow Mend and Power Word: Shield to preemptively absorb damage. Manage cooldowns like Rapture for heavy damage phases to maximize healing output effectively.

Basic Rotation for Discipline Priests

The core of a Discipline Priest’s rotation revolves around Power Word: Shield to absorb incoming damage. Use Shadow Mend frequently to heal and deal damage, triggering Atonement. Apply Penance to injured targets for direct healing or damage. Utilize Smite on enemies to generate additional Atonement healing. Keep Schism active on targets to boost damage and healing. Use Power Word: Radiance for burst single-target healing. Apply Evangelism after Radiance or Divine Word to enhance Penance and Smite. Maintain Rapture and Divine Word for heavy damage phases. Always keep your party shielded with Power Word: Shield to maximize absorb potential.

Advanced Cooldown Management

Mastering cooldowns is crucial for Discipline Priests to optimize healing output. Rapture should be used during heavy damage phases to bolster shields. Evangelism enhances Penance and Smite after Power Word: Radiance or Divine Word. Divine Word: Sanctuary is ideal for area-of-effect healing. Coordinate Power Word: Barrier with your team for maximum absorb during intense raids. Timing these cooldowns correctly can significantly improve your effectiveness in high-stress situations, ensuring your group’s survival.

Optimizing Your Healing Output

To maximize healing as a Discipline Priest, focus on tracking debuffs like Power Word: Shield and Penance. Use Power Word: Radiance to refresh shields on multiple targets and reduce mana costs. Always prioritize Atonement healing by damaging enemies with Smite or Penance. Maintain Power Word: Shield on high-value targets and pre-shield before incoming damage. Use Divine Word: Salvation to extend shields during downtime. Timing these abilities effectively ensures consistent, high-output healing while managing mana efficiently.

Advanced Techniques

Mastering absorb mechanics, optimizing Atonement, and synchronizing cooldowns with group demands are key to elevating your Discipline Priest gameplay in high-level content.

Mastering Absorb Mechanics

Absorb mechanics are central to Discipline Priests, preventing damage rather than healing after it’s taken. Power Word: Shield and Rapture are key, with Rapture resetting Shield’s cooldown. Tracking absorb effects helps manage mana and minimize overhealing. Synchronize absorbs with incoming damage spikes to maximize mitigation. Properly timing Atonement and Power Word: Barrier enhances your group’s survivability. Mastery of these mechanics elevates your effectiveness in raids and dungeons, making absorbs a cornerstone of your healing strategy.

Proper Use of Power Word: Shield

Power Word: Shield is a cornerstone of Discipline Priest healing, providing a potent absorb barrier. Use it preemptively on tanks or allies before heavy damage spikes to mitigate incoming harm. Rapture resets its cooldown, allowing frequent application. Timing it during high-damage phases maximizes effectiveness. Shielding low-health targets can prevent wipes, while overuse risks mana depletion. Balance its application with other absorbs to maintain efficiency and ensure sustained group survivability in both raids and dungeons.

Advanced Raid and Dungeon Healing

In advanced content, Discipline Priests must master proactive healing and absorb management. Pre-plan healing assignments with your team, focusing on high-damage phases and tank salvation. Use Power Word: Barrier and Rapture during heavy AoE damage to bolster your group. Atonement can supplement healing while dealing damage, but prioritize absorbs on vulnerable targets. Adapt your strategy dynamically, reassigning healing focus as needed. Balance mana efficiency with aggressive absorb usage to ensure group survival in high-stress encounters.

Group Content

Discipline Priests excel in group content through absorb-based healing and Atonement damage. Coordinate with your team to manage absorbs and balance damage output for optimal success.

Healing in Mythic Dungeons

Discipline Priests thrive in Mythic Dungeons due to their absorb mechanics and Atonement-based healing. Focus on pre-shielding high-damage targets and managing cooldowns like Power Word: Barrier and Rapture during intense phases. Maintain Atonement by dealing damage with Smite or Purgatory, ensuring consistent healing. Position yourself to avoid unnecessary damage while shielding the group. Coordinate with your tank to maximize Atonement uptime and balance your mana usage for sustained healing. Properly timing Power Word: Shield can prevent wipes in high-pressure situations.

Raid Healing Strategies

In raids, Discipline Priests excel by balancing absorb healing with Atonement damage. Use Power Word: Barrier during AoE damage phases and Rapture to bolster your shields. Focus on pre-shielding high-value targets and maintaining Atonement on damage dealers. Position yourself to maximize Power Word: Shield usage while avoiding unnecessary damage. Coordinate with your healers to cover gaps in healing and manage your cooldowns for progression fights. Properly timing Shadowfiend or Mindbender can help maintain mana for extended encounters.

PvP as a Discipline Priest

In PvP, Discipline Priests shine with their unique blend of healing and damage. Use Power Word: Shield to protect allies and Rapture to bolster your absorbs. Maintain Atonement on teammates to heal through damage while dealing consistent harm with Mind Blast and Holy Fire. Position yourself to avoid direct focus and utilize Shadowfiend for burst healing or damage. Manage your mana carefully, as prolonged fights require efficient cooldown usage. Coordinate with your team to maximize crowd control and defensive capabilities.

Addons and WeakAuras

Addons like Healbot and VuhDo enhance gameplay by streamlining healing rotations and tracking cooldowns. WeakAuras helps customize visual alerts for abilities, ensuring optimal situational awareness and decision-making.

Essential Addons for Discipline Priests

For Discipline Priests, essential addons include Healbot and VuhDo, which simplify healing rotations and cooldown tracking. WeakAuras is crucial for creating custom alerts for abilities like Power Word:Barrier and Rapture, ensuring optimal use. Deadly Boss Mods provides raid-specific alerts, while ElvUI enhances UI customization for better situational awareness. These tools streamline gameplay, making it easier to manage absorbs, heal effectively, and maintain high performance in both Mythic+ and raid environments.

Setting Up WeakAuras for Discipline Priests

WeakAuras is a powerful tool for Discipline Priests, allowing customization of ability tracking and cooldown management. Create auras for Power Word: Shield and Rapture to monitor their status and procs. Set up visual alerts for Power Word: Barrier and Preacher’s WORD: Salvation to ensure timely use. Track Atonement buffs on allies and configure timers for Evangelism and Archangel. This setup enhances situational awareness, enabling better absorb management and healing efficiency in raids and Mythic+ dungeons.

Common Mistakes

Overhealing, poor Rapture management, and improper positioning are frequent errors. Neglecting Atonement tracking and inefficient cooldown use also hinder performance. Address these to optimize healing impact.

Avoiding Overhealing

Overhealing is a common issue for Discipline Priests, as it wastes mana and reduces efficiency. To avoid this, focus on healing only what’s necessary and prioritize absorbs like Power Word: Shield. Use healing meters to track overhealing percentages and adjust your spell usage accordingly. Avoid casting large heals on targets at full health, and instead, rely on Atonement and pre-shields during downtime. Managing Rapture effectively also helps minimize unnecessary healing spikes.

Managing Mana Efficiently

Mana management is crucial for Discipline Priests to maintain consistent healing throughout long encounters. Prioritize spells like Power Word: Shield and Flash Heal wisely, as they are mana-intensive. Use Power Word: Solace and Holy Nova during downtime to regenerate mana. Avoid casting unnecessary heals and rely on absorbs when possible. Monitor your mana levels and adjust your spell usage to prevent depletion, especially during intense phases. Efficient mana management ensures sustained healing output and prevents burnout in raids or dungeons.

Positioning and Awareness

Proper positioning and situational awareness are vital for Discipline Priests to maximize healing efficiency and avoid danger. Always maintain a safe distance from enemies while staying within range of your tank and team. Be mindful of environmental hazards like void zones or AoE effects. Use your camera angles effectively to anticipate movement and threats. Keep an eye on your surroundings to avoid unnecessary damage and ensure optimal casting conditions. Awareness enhances your ability to react quickly and protect your group.

Mastering a Discipline Priest requires practice, patience, and dedication. Continuously refine your strategies, stay updated on class changes, and adapt to new challenges. Good luck!

Final Tips for Success

To excel as a Discipline Priest, stay adaptable and continuously improve. Optimize cooldowns like Rapture and Power Word:Barrier for high-damage phases. Focus on efficient mana management and positioning to maximize healing output. Communicate with your team to coordinate strategies. Analyze logs to identify areas for improvement and adapt to raid mechanics. With practice and dedication, you’ll become a vital asset to your group, ensuring success in even the most challenging content.

Resources for Further Learning

For deeper insights, check out official Blizzard forums and Icy Veins for comprehensive guides. Raider.IO offers raid and dungeon strategies, while Wowhead provides detailed class overviews. YouTube channels like BibleThump and Priest guides share advanced techniques; Join Discord communities for real-time advice and Reddit’s Priest community for shared experiences. These resources will help refine your Discipline Priest skills and stay updated on the latest trends.

texte d’opinion exemple pdf

An opinion text is a written piece where the author presents their viewpoint on a specific topic‚ supported by arguments and evidence․ It is a common form of argumentative writing‚ often used in editorials‚ articles‚ and academic settings․ The goal is to persuade or inform the reader‚ encouraging them to consider the author’s perspective․ Opinion texts are structured to clearly express a personal stance‚ making them a powerful tool for communication and debate․

1․1․ What is an Opinion Text?

An opinion text is a type of written document where the author clearly expresses their personal viewpoint on a specific topic․ It is an argumentative text that requires the author to build a reasoning process based on reliable data and information to demonstrate the validity of their perspective․ Opinion texts are commonly found in editorials‚ articles‚ and academic writings‚ and they serve to engage the reader‚ influence their thoughts‚ or provoke reflection․ The author’s goal is to convince or inform the audience by presenting a well-structured argument supported by evidence‚ examples‚ and logical conclusions․ Opinion texts often follow a clear structure‚ including an introduction‚ development‚ and conclusion‚ to effectively communicate the author’s stance․ They are essential tools for expressing ideas‚ defending a position‚ and encouraging critical thinking․ By using persuasive language and logical flow‚ opinion texts aim to leave a lasting impact on the reader․

1․2․ Importance of Opinion Texts

Opinion texts play a crucial role in fostering dialogue‚ critical thinking‚ and the exchange of ideas․ They allow individuals to express their perspectives on various topics‚ from social issues to cultural debates‚ and encourage readers to engage with different viewpoints․ Opinion texts are essential in media‚ academia‚ and personal communication‚ as they provide a platform for persuasion‚ reflection‚ and informed decision-making․ By presenting well-supported arguments‚ opinion texts help readers evaluate evidence‚ challenge assumptions‚ and form their own opinions․ They also serve as tools for social commentary‚ addressing contemporary challenges and sparking meaningful conversations․ The ability to write and understand opinion texts is vital for effective communication‚ as it promotes empathy‚ understanding‚ and intellectual growth․ Whether in editorials‚ academic essays‚ or personal blogs‚ opinion texts empower individuals to voice their thoughts and contribute to societal discourse․ Their importance lies in their ability to inspire‚ inform‚ and influence‚ making them a cornerstone of written communication․

Structure of an Opinion Text

An opinion text typically follows a clear structure: introduction‚ development‚ and conclusion; The introduction presents the thesis‚ the development supports it with arguments and evidence‚ and the conclusion summarizes the main points‚ reinforcing the author’s viewpoint․

The introduction of an opinion text is crucial as it sets the tone and presents the author’s thesis statement․ It should engage the reader and clearly outline the main argument or viewpoint․ A strong introduction often includes a hook to capture attention‚ followed by background information to contextualize the topic․ The thesis statement is typically placed at the end of the introduction‚ summarizing the author’s stance and guiding the reader through the rest of the text․ A well-crafted introduction ensures that the reader understands the purpose and direction of the opinion text‚ making it easier to follow the subsequent arguments and evidence․ By effectively introducing the topic and thesis‚ the author lays a solid foundation for a persuasive and coherent opinion text․

2․2․ Development

The development section of an opinion text elaborates on the thesis statement‚ presenting supporting arguments and evidence․ This part of the text is where the author builds their case‚ ensuring each argument is clearly explained and backed by relevant facts‚ examples‚ or data․ Logical flow is essential‚ with each paragraph focusing on a single idea and transitioning smoothly to the next․ The development should address potential counterarguments‚ demonstrating a balanced understanding of the topic while reinforcing the author’s position․ Effective use of persuasive language and rhetorical devices can enhance the convincing power of the arguments․ By thoroughly developing their ideas‚ the author strengthens the overall persuasiveness of the opinion text‚ making it more engaging and credible for the reader․

2․3․ Conclusion

The conclusion of an opinion text serves as the final statement‚ summarizing the key arguments and reinforcing the thesis․ It provides a clear and impactful ending‚ leaving the reader with a lasting impression of the author’s viewpoint․ In this section‚ the author should avoid introducing new information and instead focus on restating the main points in a concise manner․ Effective conclusions often include a call to action or a thought-provoking statement to engage the reader further․ It is important to maintain a logical flow‚ ensuring that the conclusion ties back to the introduction and development seamlessly․ A strong conclusion enhances the overall effectiveness of the opinion text‚ solidifying the author’s position and encouraging the reader to reflect on the presented arguments․

Key Components of an Opinion Text

A well-crafted opinion text includes a clear thesis‚ logical arguments‚ and persuasive evidence․ It also requires effective transitions and a strong conclusion to reinforce the author’s viewpoint and engage the reader thoughtfully with coherence and impact․

3․1․ Clear Thesis Statement

A clear thesis statement is the foundation of an effective opinion text․ It concisely presents the author’s main argument or viewpoint‚ ensuring the reader understands the central idea from the outset․ A strong thesis is specific‚ focused‚ and arguable‚ guiding the entire text’s structure and content․ It should avoid ambiguity‚ providing a roadmap for the arguments to follow․ For example‚ in an opinion text about the importance of artistic education‚ the thesis might state‚ “Artistic education is essential for fostering creativity and critical thinking in students․” This statement sets the tone and direction‚ making it easier for the reader to engage with the supporting arguments and evidence․ Without a clear thesis‚ the text risks being vague and disjointed‚ losing its persuasive power․

3․2․ Supporting Arguments

Supporting arguments are the backbone of an opinion text‚ providing the necessary evidence and reasoning to validate the thesis statement․ These arguments should be logical‚ well-organized‚ and directly related to the central claim․ Each argument is typically developed in a separate paragraph‚ ensuring clarity and coherence․ For instance‚ in a text arguing for the impact of social networks on society‚ one supporting argument might focus on how platforms foster global connectivity‚ while another could address concerns about privacy and data security․ Effective supporting arguments are backed by credible sources‚ such as statistics‚ expert opinions‚ or real-life examples‚ to enhance their persuasiveness․ The use of transitional phrases and connectors‚ like “firstly‚” “additionally‚” and “however‚” helps maintain a smooth flow between ideas․ By presenting multiple‚ well-supported arguments‚ the author strengthens their position‚ making the text more convincing and engaging for the reader․

3․3․ Evidence and Examples

Evidence and examples are essential components of an opinion text‚ serving as the foundation for supporting arguments and reinforcing the thesis statement․ They provide concrete proof to validate the author’s claims‚ making the text more persuasive and credible․ For instance‚ in an opinion text discussing the importance of artistic education‚ the author might cite studies showing improved academic performance among students engaged in arts programs․ Examples can be statistical‚ anecdotal‚ or factual‚ depending on the context․ Including specific instances helps illustrate key points and makes the text relatable․ For example‚ when arguing about the impact of social networks‚ the author could reference a study linking social media usage to mental health trends․ Properly integrating evidence and examples ensures the text is well-supported and logically coherent․ Additionally‚ citing credible sources enhances the author’s authority and strengthens the reader’s confidence in the argument․ By combining evidence with examples‚ the text becomes more engaging and persuasive‚ effectively convincing the audience of the author’s viewpoint․

3․4․ Logical Conclusions

A logical conclusion is the final step in an opinion text‚ summarizing the main arguments and reinforcing the thesis statement․ It provides a clear and concise restatement of the author’s viewpoint‚ ensuring the reader is left with a strong impression of the writer’s position․ A well-crafted conclusion ties together the evidence and examples presented‚ emphasizing their significance and relevance to the topic․ The conclusion should not introduce new information but rather synthesize the existing material to highlight the validity of the argument․ Effective conclusions often end with a thought-provoking statement or a call to action‚ encouraging the reader to reflect on the issue or consider the author’s perspective․ Properly structured‚ a logical conclusion strengthens the overall coherence of the text and leaves the audience with a clear understanding of the author’s stance․ It is essential to maintain clarity and avoid emotional appeals without evidence to ensure the conclusion remains persuasive and credible․

Examples of Opinion Texts

Opinion texts often address contemporary issues‚ such as the importance of artistic education or the impact of social networks on society․ These examples demonstrate how to structure and argue an opinion effectively‚ providing clear evidence and persuasive language to support a viewpoint․

4․1․ Example 1: Importance of Artistic Education

In one example of an opinion text‚ the author argues that artistic education is essential for fostering creativity and critical thinking in students․ They emphasize that while subjects like math and science are crucial‚ art education helps students develop their imaginations and express their unique perspectives․ The text highlights how engaging in arts like music‚ painting‚ or theater can improve cognitive skills and emotional intelligence․ The author also points out that societies with strong artistic traditions often produce innovative thinkers and leaders․ They conclude by advocating for the inclusion of artistic education in school curricula‚ arguing that it prepares students for a dynamic and ever-changing world․ This example demonstrates how to present a clear opinion supported by logical arguments and evidence‚ making it a compelling case for the importance of artistic education․

4․2․ Example 2: Impact of Social Networks

In another example of an opinion text‚ the author explores the impact of social networks on modern society․ They argue that while platforms like Facebook and Instagram have revolutionized communication and connectivity‚ they also pose significant challenges․ The text highlights how social networks have enabled global interactions‚ fostering cultural exchange and awareness․ However‚ the author also critiques the negative effects‚ such as privacy concerns‚ cyberbullying‚ and the spread of misinformation․ They emphasize the need for responsible use and regulation to mitigate these issues․ The author supports their arguments with examples of both positive outcomes‚ like social movements gaining traction online‚ and negative consequences‚ such as mental health impacts from excessive screen time․ This opinion text serves as a balanced analysis‚ urging readers to consider both the benefits and drawbacks of social networks in shaping our world․

Writing an Effective Opinion Text

Writing an effective opinion text involves presenting a clear thesis‚ supporting it with logical arguments‚ and using persuasive language․ Ensure a logical flow‚ backing claims with evidence‚ and addressing counterarguments to strengthen your position and engage readers effectively․

5․1․ Choosing a Relevant Topic

Choosing a relevant topic is crucial for writing an effective opinion text․ Select a subject that is current‚ specific‚ and meaningful to your audience․ Ensure it aligns with your expertise or passion to maintain authenticity․ Avoid overly broad topics; instead‚ narrow your focus to a specific angle or issue within a larger subject․ For example‚ instead of writing about “social media‚” focus on “the impact of social media on mental health among teenagers․” Consider your audience and choose a topic that resonates with their interests or concerns․ Additionally‚ pick a topic that allows for credible evidence and examples to support your arguments; A well-chosen topic will engage readers‚ provide clarity‚ and make your opinion text more persuasive and impactful․ Always ensure your topic is feasible to research and argue within the word limit of your text․

5․2․ Using Persuasive Language

Using persuasive language is essential for making your opinion text compelling and convincing․ Employ rhetorical techniques such as rhetorical questions‚ metaphors‚ and analogies to engage your audience․ Emotive language can evoke feelings and create empathy‚ while strong adjectives and verbs add force to your arguments․ Use phrases like “undeniably‚” “clearly‚” or “without a doubt” to emphasize the validity of your points․ Additionally‚ incorporate logical transitions to connect your ideas smoothly‚ ensuring a coherent flow of thought․ Persuasive language should be tailored to your audience‚ addressing their values‚ beliefs‚ and concerns․ Avoid vague statements; instead‚ use specific examples and facts to strengthen your case․ Remember‚ the goal is to influence the reader’s opinion‚ so choose words and phrases that resonate with them․ By combining emotional appeal with logical reasoning‚ you can create a persuasive and memorable opinion text that leaves a lasting impression on your audience․

5․3․ Ensuring Logical Flow

Ensuring logical flow is crucial for the clarity and persuasiveness of an opinion text․ A well-structured text guides the reader through your arguments seamlessly‚ making it easier to follow and accept your viewpoint․ Start by introducing your thesis statement‚ then develop each argument in separate paragraphs‚ and conclude by summarizing your main points․ Use transition words and phrases such as “however‚” “additionally‚” or “therefore” to connect ideas logically․ Each paragraph should focus on a single idea‚ supported by evidence or examples‚ to maintain coherence․ Avoid jumping between unrelated points‚ as this can confuse the reader․ The flow should follow a clear progression‚ starting with your strongest argument and building toward a persuasive conclusion․ Using a consistent tone and language also helps maintain the logical flow․ Finally‚ revise your text to ensure that each sentence and paragraph leads naturally to the next‚ creating a smooth and convincing narrative that reinforces your opinion․

Common Mistakes to Avoid

When writing an opinion text‚ avoid weak or unsupported arguments‚ as they undermine credibility․ Emotional appeals without evidence can alienate readers․ Poor organization‚ such as lack of transitions or unclear structure‚ hinders comprehension and persuasiveness․

6․1․ Weak or Unsupported Arguments

One of the most common mistakes in opinion writing is presenting weak or unsupported arguments․ This occurs when claims lack credible evidence or logical reasoning‚ making them unconvincing to readers․ Without strong factual or experiential backing‚ arguments lose their persuasive power and may appear baseless or biased․

For example‚ stating that “social media is harmful” without providing statistics or studies to support this claim weakens the argument․ Similarly‚ relying solely on personal opinions without addressing counterpoints can make the text less credible․ Readers expect well-rounded reasoning and evidence to justify the author’s stance․

To avoid this‚ writers should ensure each argument is supported by relevant data‚ examples‚ or expert opinions․ Additionally‚ acknowledging potential counterarguments and refuting them strengthens the overall position․ By doing so‚ the text becomes more balanced‚ persuasive‚ and intellectually rigorous․

6․2․ Emotional Appeals Without Evidence

Another common mistake in opinion writing is relying heavily on emotional appeals without supporting evidence․ While emotions can engage readers‚ they alone are insufficient to build a convincing argument․ Without factual backing‚ emotional appeals can come across as manipulative or insincere‚ undermining the text’s credibility․

For instance‚ a statement like “This policy will ruin countless lives” grabs attention but lacks substance․ Readers need evidence‚ such as statistics or real-life examples‚ to understand why the policy might have such consequences․ Emotional language without context can alienate audiences seeking logical reasoning․

To avoid this‚ writers should balance emotional appeals with concrete evidence; By providing clear examples and logical explanations‚ the argument becomes more persuasive and respectful of the reader’s intelligence․ This approach strengthens the text’s impact and ensures the message resonates effectively․

6․3․ Poor Organization

Poor organization is a significant mistake that can weaken the effectiveness of an opinion text․ A well-structured text guides the reader through the argument‚ ensuring clarity and coherence․ However‚ when the content is disorganized‚ it becomes difficult for readers to follow the logic‚ leading to confusion and disengagement․

A common issue is the lack of a clear introduction‚ development‚ and conclusion․ Without these essential sections‚ the text may appear fragmented․ Additionally‚ failing to use transition words or phrases can cause ideas to feel disconnected‚ making the argument less persuasive․

To avoid poor organization‚ it’s crucial to outline the text before writing․ Start with a strong thesis statement‚ develop each argument in separate paragraphs‚ and conclude by summarizing the main points․ Ensuring a logical flow will help readers understand and engage with the opinion presented․ Proper organization enhances readability and strengthens the overall impact of the text․

PDF

emergency medical consent form pdf

An Emergency Medical Consent Form is a legal document authorizing others to make medical decisions for a minor in emergencies. It ensures prompt treatment when parents or guardians are unavailable, detailing medical history, allergies, and consent for emergency care. Widely used by schools, sports organizations, and childcare providers, it provides clear guidance and peace of mind.

Importance of Emergency Medical Consent Forms

The importance of Emergency Medical Consent Forms lies in their ability to ensure timely and appropriate medical care during emergencies. These forms provide legal authorization for healthcare providers to administer necessary treatments when parents or guardians are unavailable. By including detailed medical history, allergies, and emergency contact information, they help prevent delays in critical situations. Schools, childcare providers, and sports organizations rely on these forms to safeguard minors and ensure prompt care. They also protect caregivers from legal liability by clearly outlining the scope of consent. Additionally, Emergency Medical Consent Forms offer peace of mind for parents, knowing their child’s health and well-being are protected. Their flexibility allows customization to fit individual needs, making them indispensable for anyone responsible for minors in various settings. Overall, these forms are vital for preventing medical complications and ensuring effective communication between caregivers and healthcare providers in emergencies.

Key Components of an Emergency Medical Consent Form

An Emergency Medical Consent Form includes personal and emergency contact information, medical history, allergies, and consent for emergency treatment. It also requires signatures from the parent or guardian and witnesses, ensuring legal validity. These components ensure clear communication and proper authorization for medical care in critical situations.

3.1. Personal and Emergency Contact Information

Personal and emergency contact information is a critical component of an Emergency Medical Consent Form. This section typically includes the full name of the child, their date of birth, and residential address. It also requires the names and contact details of parents or legal guardians, ensuring that healthcare providers can reach them quickly in an emergency. Additionally, the form often includes alternate emergency contacts, such as relatives or trusted individuals, who can be reached if the primary guardians are unavailable. This ensures continuous communication and prompt decision-making. The inclusion of phone numbers, email addresses, and physical addresses guarantees that all relevant parties can be notified and involved as needed. In some cases, the form may also request details about the child’s primary healthcare provider, including their name and contact information, to facilitate coordination of care. This section is essential for preventing delays in treatment and ensuring that medical professionals have access to vital information. By providing clear and accurate contact details, parents or guardians can help ensure their child receives timely and appropriate care in any emergency situation. This information is often the first point of reference for healthcare providers, making its accuracy and completeness paramount. Ultimately, this component serves as the foundation for effective communication and care coordination, safeguarding the child’s well-being in critical moments.

3.2. Medical History and Allergies

The medical history and allergies section of an Emergency Medical Consent Form is vital for ensuring appropriate care in critical situations. This part of the form requires detailed information about the individual’s health, including pre-existing medical conditions, chronic illnesses, and any known allergies to medications, foods, or environmental factors. For example, noting a severe allergy to penicillin or a history of asthma is crucial for healthcare providers to avoid harmful treatments and administer the correct care. Additionally, the form often includes a list of current medications, supplements, or vaccines, as these can influence treatment decisions. Including information about past surgeries, hospitalizations, or ongoing medical treatments further aids in providing comprehensive care. Parents or guardians are typically responsible for providing this information, ensuring its accuracy and relevance. The form may also ask for the name and contact details of the child’s primary physician, allowing healthcare providers to consult with them if needed. By documenting this information, the form helps prevent potential complications and ensures that medical professionals are well-informed. This section is particularly important for children with complex medical needs, as it provides a clear guide for emergency responders and healthcare providers. Overall, the medical history and allergies section ensures that care is tailored to the individual’s specific health requirements, reducing risks and improving outcomes in emergencies. Accuracy and completeness in this section are paramount to safeguarding the individual’s health and well-being.

3.3. Consent for Emergency Medical Treatment

The medical history and allergies section of an Emergency Medical Consent Form is vital for ensuring appropriate care in critical situations. This part of the form requires detailed information about the individual’s health, including pre-existing medical conditions, chronic illnesses, and any known allergies to medications, foods, or environmental factors. For example, noting a severe allergy to penicillin or a history of asthma is crucial for healthcare providers to avoid harmful treatments and administer the correct care. Additionally, the form often includes a list of current medications, supplements, or vaccines, as these can influence treatment decisions. Including information about past surgeries, hospitalizations, or ongoing medical treatments further aids in providing comprehensive care. Parents or guardians are typically responsible for providing this information, ensuring its accuracy and relevance. The form may also ask for the name and contact details of the child’s primary physician, allowing healthcare providers to consult with them if needed. By documenting this information, the form helps prevent potential complications and ensures that medical professionals are well-informed. This section is particularly important for children with complex medical needs, as it provides a clear guide for emergency responders and healthcare providers. Overall, the medical history and allergies section ensures that care is tailored to the individual’s specific health requirements, reducing risks and improving outcomes in emergencies. Accuracy and completeness in this section are paramount to safeguarding the individual’s health and well-being.

3.4. Signatures and Witnesses

The section on signatures and witnesses is a critical component of an Emergency Medical Consent Form, ensuring the document’s validity and legality. Typically, the form requires the signature of the parent or legal guardian, confirming their consent for emergency medical treatment. In some cases, the signature of the minor may also be included if they are of sufficient age and understanding. Witnesses are often required to verify the authenticity of the signatures, adding an extra layer of legal protection. The witness must be an independent third party, not directly involved in the minor’s care, to ensure impartiality. The signatures section may also include a date field to confirm when the consent was granted, ensuring the document remains relevant and up-to-date. Additionally, some forms may require notarization, particularly if the consent is intended for extended periods or international travel. The presence of clear, legible signatures and witnesses ensures that healthcare providers can act confidently in an emergency, knowing they have proper authorization. This section underscores the importance of accountability and transparency in medical decision-making, safeguarding both the minor and the healthcare provider. By including these elements, the form maintains its enforceability and provides peace of mind for all parties involved. The legal robustness of this section is essential for preventing disputes and ensuring timely, appropriate care in critical situations.

Who Uses Emergency Medical Consent Forms?

Emergency Medical Consent Forms are widely used by parents, legal guardians, schools, childcare providers, and sports organizations to ensure minors receive prompt medical care when parents are unavailable. They are also utilized by babysitters, grandparents, and activity leaders to safeguard children’s health in emergencies.

4.1. Parents and Legal Guardians

Parents and legal guardians are primary users of Emergency Medical Consent Forms, as they are responsible for their minor children’s health and well-being. These forms allow parents to grant permission for emergency medical treatment when they are not present. This is especially crucial in situations where delays in treatment could worsen a child’s condition. By completing the form, parents ensure that caregivers, such as babysitters, grandparents, or childcare providers, can act swiftly in emergencies. The document typically includes the child’s medical history, allergies, and contact information, providing healthcare providers with essential details to administer appropriate care. Parents often carry copies of the form during trips or enroll their children in activities requiring medical consent. Schools and sports organizations frequently request these forms to safeguard students’ health during events or field trips. Legal guardians, such as foster parents or relatives with court-ordered custody, also use these forms to make medical decisions for minors in their care. Ultimately, the form offers peace of mind for parents, knowing their child can receive immediate care, even in their absence. It serves as a vital tool for protecting minors and ensuring their safety in unexpected situations.

4.2. Schools and Childcare Providers

Schools and childcare providers frequently use Emergency Medical Consent Forms to ensure they can act in the best interest of children under their care during emergencies. These institutions often require parents to complete such forms as part of enrollment or participation in activities. The forms typically include details about the child’s medical history, allergies, and emergency contact information, enabling staff to make informed decisions quickly. For example, during field trips, sports events, or after-school programs, having this document on hand ensures that caregivers can provide consent for immediate medical treatment if a parent cannot be reached. Childcare centers also rely on these forms to handle unexpected situations, such as accidents or sudden illnesses, while the child is in their care. By maintaining these documents, schools and childcare providers demonstrate their commitment to safeguarding children’s health and well-being. The forms also protect institutions from liability by ensuring they have legal authority to act in emergencies. Overall, Emergency Medical Consent Forms are a critical tool for schools and childcare providers, allowing them to respond effectively and responsibly in urgent situations.

4.3. Sports and Activity Organizations

Sports and activity organizations frequently require Emergency Medical Consent Forms to ensure the safety and well-being of participants, particularly minors, during events or training sessions. These forms are essential for organizations that oversee activities with a higher risk of injury, such as team sports, camps, or adventure programs. By having a signed consent form, organizations can swiftly respond to medical emergencies, knowing they have the legal authority to act in the participant’s best interest; The forms typically include details about the participant’s medical history, allergies, and emergency contacts, enabling staff to make informed decisions. For example, coaches or event organizers can use this information to provide immediate care or transport the individual to a healthcare facility if necessary. Many organizations also use these forms to outline the scope of consent, ensuring they are prepared to handle situations where parents or guardians are unavailable. This practice not only protects the health of participants but also reduces liability for the organization. As a result, Emergency Medical Consent Forms have become a standard requirement for enrollment in sports leagues, camps, and other physical activities, promoting safety and preparedness in emergency situations.

Legal Aspects of Emergency Medical Consent Forms

Emergency Medical Consent Forms are legally binding documents ensuring compliance with healthcare laws. They validate treatment decisions, protect privacy, and outline jurisdictional authority, providing a framework for ethical and lawful care in emergencies while respecting patient autonomy and medical provider responsibilities.

5.1. Age of Majority Considerations

Age of majority considerations play a critical role in the legal validity of emergency medical consent forms. The age of majority, typically 18 or 19 years old depending on the jurisdiction, determines when an individual can legally make their own medical decisions. Until a minor reaches this age, parents or legal guardians must provide consent for medical treatment. Emergency medical consent forms must account for these age thresholds to ensure compliance with local laws.

For minors, the form must include the signature of a parent or guardian, granting authority for emergency medical care when they are unable to provide consent themselves. Once an individual reaches the age of majority, they can sign the consent form independently, taking full responsibility for their medical decisions. This transition is crucial for healthcare providers to respect patient autonomy while adhering to legal standards.

Understanding and incorporating age of majority considerations ensures that emergency medical consent forms are legally binding and ethically sound. This aspect safeguards both minors and adults, providing clear guidelines for healthcare providers in emergencies. The form must explicitly state the applicable age of majority to avoid confusion and potential legal disputes. By addressing this factor, the document ensures seamless decision-making processes in critical situations.

5.2. Legal Guardianship Requirements

Legal guardianship requirements are essential for the validity of emergency medical consent forms, particularly when dealing with minors or individuals incapable of making decisions. A legal guardian must be appointed by a court to have the authority to consent to medical treatment on behalf of the individual. This ensures that the guardian can act in the best interest of the person, especially in life-threatening situations.

The appointment of a legal guardian typically involves court proceedings, where the individual’s capacity to make decisions is assessed. Once granted, the guardian’s authority is documented, and they can provide consent for emergency medical care. This legal framework protects both the individual and healthcare providers by ensuring that decisions are made in accordance with the law.

In cases where no legal guardian is appointed, healthcare providers may face challenges in obtaining consent for treatment. This underscores the importance of having a clear legal guardianship structure in place. The requirements for legal guardianship vary by jurisdiction, so it’s crucial to adhere to local laws to ensure the form’s validity. Proper documentation and court approval are necessary to avoid disputes or legal complications.

Emergency medical consent forms must reflect the legal guardianship status accurately to prevent delays in treatment. If a legal guardian is not available, alternative procedures may be implemented to ensure timely care. Understanding these requirements helps ensure that decisions are made ethically and legally, safeguarding all parties involved.

5.3. Form Validity and Jurisdiction

Emergency medical consent forms must adhere to specific legal standards to ensure their validity and enforceability. Jurisdictional requirements play a critical role, as laws governing medical consent vary by region. In the United States, for example, each state has its own regulations regarding the content, format, and execution of such forms. It is essential to use a form that complies with the laws of the jurisdiction where it will be used, as forms valid in one state may not be recognized in another.

Form validity also depends on proper execution, such as notarization or witness signatures, as required by local laws. Failure to meet these requirements can render the form unenforceable, potentially delaying critical medical treatment. Additionally, some jurisdictions may require the form to be updated periodically to remain valid. Individuals should consult legal professionals to ensure their emergency medical consent form meets all applicable standards.

When traveling across state lines or relocating, it is crucial to verify the form’s validity in the new jurisdiction. This ensures uninterrupted authorization for emergency medical care. Proper attention to jurisdictional requirements safeguards both the individual and healthcare providers, preventing legal disputes and ensuring timely treatment. Adhering to these guidelines is essential for the form’s effectiveness.

relion blood pressure monitor instruction manual

The ReliOn Blood Pressure Monitor is a reliable, user-friendly device designed for accurate home blood pressure tracking.

Overview of the ReliOn Blood Pressure Monitor

The ReliOn Blood Pressure Monitor is a user-friendly device designed for accurate blood pressure tracking at home. It features automatic inflation, easy-to-read displays, and memory storage for multiple users. The monitor is compatible with various cuff sizes and ensures precise readings. With its sleek design and simple operation, it is ideal for individuals seeking to manage their blood pressure effectively. The device is backed by certification standards, ensuring reliability and accuracy for consistent health monitoring.

Importance of Using a Blood Pressure Monitor

Regular blood pressure monitoring is crucial for early detection of hypertension and maintaining cardiovascular health. A blood pressure monitor like the ReliOn device allows users to track readings accurately from home, enabling timely medical interventions. It helps identify trends, guides lifestyle adjustments, and ensures consistent health management. With certified accuracy, it empowers individuals to take control of their well-being, fostering better understanding and management of blood pressure for improved long-term health outcomes.

Key Features of the ReliOn Blood Pressure Monitor

The ReliOn monitor offers automatic inflation and easy-to-read LCD displays, ensuring accurate blood pressure and heart rate measurements. It features memory storage for tracking progress, a comfortable wide-range cuff, and compatibility with optional AC adapters. The device is designed for user convenience, with clear instructions and certifications meeting medical standards. Its portability and simple operation make it an ideal choice for home use, providing reliable health monitoring.

Unboxing and Components

The package includes the monitor, a wide-range cuff, AC adapter, and instruction manual. These components ensure easy setup and immediate use.

What’s Included in the Box

The ReliOn Blood Pressure Monitor box contains the monitor unit, a wide-range cuff suitable for various arm sizes, an AC adapter for power, and a detailed instruction manual. Additionally, some models include a quick start guide to help users begin using the device immediately. All components are carefully packaged to ensure they arrive in perfect condition. This comprehensive setup allows for easy installation and operation right out of the box.

Understanding the Monitor and Cuff

The ReliOn Blood Pressure Monitor features an automatic inflation system for easy use. The cuff is designed to fit various arm sizes comfortably. It ensures accurate readings by wrapping snugly around the upper arm. The monitor itself is compact, with a clear display for systolic, diastolic, and pulse readings. Proper cuff placement and fit are crucial for precise measurements. Always refer to the manual for guidance on using the monitor and cuff effectively to ensure accurate blood pressure readings and safe operation.

Accessories and Optional Components

The ReliOn Blood Pressure Monitor comes with essential accessories, including a wide-range cuff, AC adapter, and instruction manual. Additional cuffs, such as the optional extra-large cuff, are available for purchase. A carrying case or storage pouch can be used to protect the monitor and cuff when not in use. These accessories enhance convenience and ensure proper storage, maintaining the device’s functionality. Always use genuine ReliOn parts for compatibility and optimal performance.

Safety Precautions

Always follow safety guidelines to ensure proper use and avoid injury. Read the manual carefully before operating the monitor. Regularly inspect the cuff for damage.

General Safety Guidelines

Adhere to safety guidelines to ensure proper use and avoid potential risks. Always inspect the cuff for damage before use and avoid using it if damaged. Do not exert the cuff too tightly or use improper techniques, as this may cause discomfort or inaccurate readings. Keep the monitor out of reach of children and avoid exposing it to extreme temperatures or moisture. Regularly clean the device as instructed in the manual. Never modify the monitor or cuff, as this may void the warranty or cause malfunction.

Contraindications for Use

The ReliOn Blood Pressure Monitor is not suitable for individuals with certain medical conditions. Avoid using the device if you have recent injuries, severe circulatory issues, or conditions that may interfere with accurate readings. Do not use the monitor if you have an implanted medical device, such as a pacemaker, or if you are experiencing irregular heartbeats or arrhythmias. Additionally, individuals with significant arm mobility issues or severe edema should consult a healthcare professional before using the device. Always follow the manual’s guidelines for safe and effective use.

Proper Handling and Storage

To maintain the ReliOn Blood Pressure Monitor’s accuracy and longevity, store it in a cool, dry place away from direct sunlight. Avoid exposing the device to extreme temperatures or humidity. Clean the monitor and cuff regularly with a soft cloth and mild soap. Store the cuff separately to prevent stretching or creasing. Keep the monitor in its original packaging or a protective case when not in use. Always handle the device with care to prevent damage to the screen or internal components.

Setting Up the Monitor

To set up your ReliOn Blood Pressure Monitor, first, unpack all components and ensure the monitor is placed on a stable surface. Insert the provided batteries, ensuring correct polarity. Power on the device and allow it to initialize. Refer to the manual for specific instructions on setting the date and time. Familiarize yourself with the buttons and display to ensure smooth operation during measurements.

Preparing the Monitor for First Use

Before using your ReliOn Blood Pressure Monitor, carefully unpack all components from the box. Ensure the monitor is placed on a stable, flat surface. Insert the provided batteries into the monitor, following the polarity indicators marked inside the battery compartment. Power on the device by pressing and holding the power button until the display lights up. Allow the monitor to complete its self-test, which may take a few seconds. Once initialized, set the date and time according to the instructions in the manual. Familiarize yourself with the buttons and display to ensure smooth operation during measurements.

Choosing the Correct Cuff Size

To ensure accurate readings, select a cuff size that fits your upper arm properly. Measure your arm circumference using a flexible tape measure around the midpoint of your upper arm while it’s relaxed and at heart level. Compare this measurement to the size chart provided with your ReliOn monitor to choose the appropriate cuff. The cuff should be snug but not too tight, allowing you to fit a finger underneath comfortably. Proper fit is essential for precise blood pressure measurements.

Positioning the Cuff Correctly

Place the cuff on your bare upper arm, approximately 1-2 inches above the elbow crease. Ensure the cuff is centered and the artery marker aligns with the inside of your arm. Sit comfortably with your arm at heart level, resting on a flat surface. Avoid bending or flexing your arm during measurement. Proper positioning ensures accurate blood pressure readings and prevents errors caused by incorrect placement; Follow the ReliOn manual’s guidelines for optimal results.

Operating the Monitor

The ReliOn Blood Pressure Monitor operates with automatic inflation, providing quick and accurate readings. Follow the manual’s step-by-step guide for smooth operation and consistent results.

Step-by-Step Measurement Process

To ensure accurate readings, follow these steps:
Prepare the monitor by turning it on and ensuring the cuff is properly connected.
Sit comfortably with your arm resting at heart level.
Wrap the cuff snugly around your bare upper arm, aligning the artery marker.
Press the start button to begin automatic inflation.
Remain still and silent during measurement to avoid errors.
The monitor will display your systolic, diastolic, and pulse readings.
If an irregular heartbeat is detected, the monitor will alert you.
Record your results for future reference.

Understanding the Display and Readings

The ReliOn monitor’s display clearly shows your blood pressure and pulse. The systolic pressure (top number) measures heartbeats, while the diastolic (bottom number) measures rest. The pulse rate is displayed below. Icons indicate irregular heartbeats or cuff issues. The memory function recalls previous readings. Use the navigation buttons to scroll through stored data. Ensure values fall within normal ranges (systolic <120, diastolic <80). Refer to the manual for category guidelines and troubleshooting symbols. Accurate readings are essential for monitoring heart health.

Ensuring Accurate Results

To ensure accurate readings, sit comfortably with your back supported and avoid tight clothing. Place the cuff on your bare arm at heart level. Avoid eating, exercising, or smoking 30 minutes before use. Remain still and silent during measurement. Use the correct cuff size, as a mismatch can affect accuracy. Follow the manual’s guidelines for proper positioning and timing. Regularly check the cuff for wear and tear. For consistent results, measure at the same time daily and record your readings for tracking.

Troubleshooting Common Issues

Common issues include inaccurate readings, cuff malfunctions, and battery problems. Refer to the manual for solutions like recalibrating, adjusting cuff fit, or replacing batteries.

Resolving Inaccurate Readings

Inaccurate readings can occur due to improper cuff placement, tight clothing, or incorrect posture. Ensure the cuff fits properly, your arm is at heart level, and avoid moving during measurement. Check for loose connections or low battery. Recalibrate the monitor if necessary, following the manual’s instructions. If issues persist, consult the troubleshooting section or contact customer support for assistance. Always refer to the ReliOn Blood Pressure Monitor manual for detailed guidance.

Addressing Cuff-Related Problems

Cuff-related issues, such as improper fit or damage, can affect accuracy. Ensure the cuff is correctly sized and positioned. Avoid tight clothing that may interfere with the cuff. If the cuff is damaged or worn, replace it immediately. Refer to the manual for compatible cuff sizes and replacement options. Regularly inspect the cuff for signs of wear or leaks. Proper cuff maintenance ensures reliable performance and accurate readings. Always follow the manufacturer’s guidelines for cuff care and replacement.

Fixing Battery or Power Issues

If the monitor experiences power issues, check the battery level. Replace batteries with the correct type specified in the manual. Ensure proper installation with terminals aligned. If using an AC adapter, verify it’s securely connected. Avoid using damaged batteries or adapters, as they can cause malfunction. If issues persist, reset the device or contact customer support. Always refer to the manual for troubleshooting steps to resolve battery-related problems effectively and maintain monitor functionality.

Maintenance and Care

Regularly clean the monitor and cuff with a soft cloth to prevent dust buildup. Store in a cool, dry place away from direct sunlight. Replace batteries as needed.

Cleaning the Monitor and Cuff

Regularly clean the monitor and cuff to maintain accuracy and longevity. Use a soft, dry cloth to wipe the monitor’s surface, avoiding harsh chemicals or abrasive materials. For the cuff, gently clean with a damp cloth, ensuring it is completely dry before use. Avoid submerging the cuff in water or exposing it to extreme temperatures. Proper cleaning prevents bacterial growth and ensures reliable readings. Always follow the manual’s guidelines for care and maintenance.

Replacing Batteries

To replace the batteries, locate the battery compartment on the monitor’s underside. Open it by sliding or unscrewing, depending on the model. Insert the recommended AAA batteries, ensuring correct polarity. Avoid mixing old and new batteries. Close the compartment securely. If using an AC adapter, ensure it’s properly plugged in. Regular battery checks prevent sudden power loss and ensure accurate readings. Refer to the manual for specific battery replacement instructions. Proper maintenance guarantees optimal performance.

Updating Software (if applicable)

Software updates may be required to ensure optimal performance and accuracy. Check the instruction manual for specific guidance, as procedures vary by model. Typically, updates are done via a computer connection or through a dedicated app. Ensure the monitor is properly connected and follow on-screen instructions. After updating, verify that all settings and stored data remain intact. If unsure, consult the ReliOn customer support or refer to the manual for detailed steps. Regular updates help maintain device functionality.

Understanding Your Blood Pressure Readings

The monitor displays systolic and diastolic values, indicating blood pressure levels. Categories include normal, elevated, or high blood pressure, guiding users to track and manage their health effectively.

Interpreting Systolic and Diastolic Values

The systolic value represents the pressure during a heartbeat, while the diastolic value measures pressure between beats. Understanding these values helps users assess their blood pressure status accurately. Normal readings typically fall below 120/80 mmHg. Elevated readings range from 120/80 to 129/79 mmHg, indicating potential prehypertension; High blood pressure is diagnosed at 130/80 mmHg or higher, requiring medical attention. Regular monitoring with the ReliOn Blood Pressure Monitor ensures timely health interventions.

Understanding Blood Pressure Categories

Blood pressure readings are categorized into specific levels to help users understand their health status. Normal readings are below 120/80 mmHg, while elevated readings range from 120/80 to 129/79 mmHg. Stage 1 hypertension is diagnosed at 130/80 to 139/89 mmHg, and Stage 2 hypertension is 140/90 mmHg or higher. These categories guide users in monitoring their condition and seeking medical advice when necessary. Regular use of the ReliOn monitor helps track these levels effectively.

Tracking Your Progress Over Time

Regular monitoring with the ReliOn Blood Pressure Monitor allows users to track their readings over time. The device often includes memory storage for multiple readings, enabling users to identify trends and patterns. This feature is essential for managing blood pressure effectively and sharing data with healthcare providers. By consistently recording measurements, individuals can better understand their health and make informed lifestyle adjustments to maintain optimal blood pressure levels.

Additional Features and Functions

The ReliOn Blood Pressure Monitor offers memory storage for tracking multiple readings, customizable reminders for regular measurements, and compatibility with an AC adapter for convenient use.

Memory Storage and Data Recall

The ReliOn Blood Pressure Monitor features built-in memory storage, allowing users to save multiple readings for easy tracking. This function helps in monitoring progress over time and sharing data with healthcare providers. The device can store a significant number of measurements, ensuring comprehensive tracking without the need for manual logging. Users can recall stored data quickly, making it a convenient tool for managing blood pressure effectively. This feature enhances the overall user experience by simplifying health monitoring.

Setting Reminders for Measurements

The ReliOn Blood Pressure Monitor allows users to set reminders for regular measurements, promoting consistent tracking and better health management. These reminders ensure that users never miss a scheduled reading, helping maintain routine and accuracy. By enabling reminders, individuals can stay proactive about their blood pressure monitoring, which is crucial for early detection of potential issues and maintaining overall cardiovascular health. This feature is simple to activate and customize, making it an essential tool for daily use.

Using the AC Adapter

The ReliOn Blood Pressure Monitor comes with an AC adapter for convenient power supply. To use it, plug the adapter into the monitor and an electrical outlet. Ensure the adapter is firmly connected to avoid power interruptions. Turn on the monitor and verify it is functioning properly. Always use the provided adapter to prevent damage. This feature eliminates the need for batteries, ensuring continuous operation. Regular use of the AC adapter helps maintain accurate readings and prolongs device lifespan. Follow the guidelines for safe and efficient operation.

Technical Specifications

The ReliOn Blood Pressure Monitor meets rigorous accuracy standards, ensuring reliable readings. It supports various cuff sizes and features long-lasting battery life for consistent performance.

Accuracy and Certification Standards

The ReliOn Blood Pressure Monitor adheres to stringent accuracy standards, ensuring precise readings. It is clinically validated and certified according to international guidelines, providing reliable results. The device undergoes rigorous testing to meet both user and medical professional expectations. Its accuracy is further verified through regular quality checks, making it a trusted choice for home blood pressure monitoring. This certification ensures users receive consistent and dependable measurements, crucial for effective health management.

Compatibility with Different Cuff Sizes

The ReliOn Blood Pressure Monitor is designed to accommodate various cuff sizes, ensuring a proper fit for different arm circumferences. Compatible with standard and wide-range cuffs, it offers flexibility for users. The device supports cuffs ranging from small to extra-large, providing accurate readings for a wide range of individuals. This versatility ensures comfort and precision, making it suitable for both personal and family use. Proper cuff sizing is essential for accurate measurements, and the monitor is compatible with multiple options to meet this need.

Power Requirements and Battery Life

The ReliOn Blood Pressure Monitor operates efficiently with minimal power consumption. It typically requires 2 AAA batteries, providing extended usage before replacement. Battery life can last up to 300 measurements, ensuring long-term reliability. For added convenience, an AC adapter is available, allowing users to power the device directly from a wall outlet. This dual-power capability offers flexibility and uninterrupted monitoring, making it ideal for both home and clinical settings. Energy efficiency is a key feature, ensuring consistent performance over time.

Downloading and Referencing the Manual

The ReliOn Blood Pressure Monitor manual is available online in PDF format. Download it from the official website or trusted sources for easy reference.

How to Download the Instruction Manual

To download the ReliOn Blood Pressure Monitor manual, visit the official ReliOn website or trusted sources like ManualsLib. Select your model, choose the PDF option, and save it to your device. Ensure the source is reliable to avoid incorrect or outdated information. The manual is available in English and Spanish, providing clear instructions for setup, usage, and troubleshooting. Always refer to the official guide for accurate information.

Navigating the PDF Manual

The ReliOn Blood Pressure Monitor manual is organized into clear sections, including introduction, setup, operation, and troubleshooting. Use bookmarks or the table of contents to quickly find specific topics. The PDF is searchable, allowing you to locate keywords easily. Sections are labeled clearly, ensuring users can navigate through instructions without confusion. The manual is available in English and Spanish, catering to a broader audience. Familiarize yourself with the layout to access information efficiently and understand your device better.

Key Sections to Review

Customer Support and Resources

ReliOn offers comprehensive support through their customer service, online resources, and detailed FAQs. Users can access warranty information and troubleshooting guides for assistance.

Contacting ReliOn Customer Service

ReliOn provides customer support through various channels, including phone, email, and their official website. Users can contact them for inquiries, troubleshooting, or warranty issues. The customer service team is available during specific hours, ensuring timely assistance. For more details, visit their website or refer to the instruction manual.

Online Resources and FAQs

ReliOn offers comprehensive online resources, including FAQs, user manuals, and troubleshooting guides. Their official website provides detailed information on product usage, maintenance, and software updates. Additionally, downloadable PDF manuals and instructional videos are available to assist users with setup and operation. These resources aim to enhance user experience and ensure optimal performance of the blood pressure monitor. Regularly updated content helps address common queries and technical issues efficiently.

Warranty Information

ReliOn Blood Pressure Monitors come with a limited warranty covering manufacturing defects. The warranty period varies by model, typically ranging from one to five years. For details, refer to the instruction manual or visit the official ReliOn website. Warranty claims require proof of purchase and may exclude damages from misuse or improper maintenance. Customers can contact ReliOn customer service for warranty-related inquiries or repairs. This ensures users receive support and maintain their device’s performance over time.

pioneer receiver vsx 522 k manual

The Pioneer VSX-522-K is a high-quality AV receiver designed for home theaters, offering 4K support, HDMI connectivity, and built-in technologies for enhanced audio-visual experiences.

1.1. Overview of Pioneer VSX-522-K Receiver

The Pioneer VSX-522-K is a cutting-edge AV receiver designed for home theaters, offering 4K Ultra HD support and HDMI connectivity for seamless integration with modern devices. With a robust power output of 4 x 50 watts, it delivers clear and powerful sound. The receiver supports multi-channel audio formats, including Dolby TrueHD and DTS-HD Master Audio, ensuring an immersive listening experience. Its compact design and user-friendly interface make it an ideal choice for enhancing home entertainment systems.

1.2. Importance of the User Manual

The user manual for the Pioneer VSX-522-K is essential for optimizing its performance and ensuring proper setup. It provides detailed instructions for installation, configuration, and troubleshooting, helping users navigate advanced features like multi-channel audio and HDMI connectivity. The manual also explains how to customize settings for personalized sound experiences and maintain the receiver’s longevity. By following the guide, users can unlock the full potential of their AV receiver and enjoy a seamless home theater experience. Regular updates and maintenance tips are also included for optimal functionality.

Key Features of Pioneer VSX-522-K

The Pioneer VSX-522-K offers 4K Ultra HD support, Dolby Atmos, and DTS:X for immersive sound. It features built-in Bluetooth, HDMI connectivity, and multi-channel audio capabilities.

2.1. Technical Specifications

The Pioneer VSX-522-K features a 4-channel output with 22W per channel at 8 ohms. It supports 4K Ultra HD up to 60Hz, HDR10, and Dolby Vision. The receiver includes 4 HDMI inputs and 1 output, built-in Bluetooth for wireless streaming, and a USB port for digital audio playback. It also supports Wi-Fi for network connectivity and multi-room audio setups, ensuring versatile home theater integration. The device is compatible with Dolby Atmos and DTS:X for enhanced surround sound.

2.2. Built-in Technologies and Support

The Pioneer VSX-522-K boasts advanced technologies, including Dolby Atmos and DTS:X for immersive surround sound. It supports 4K Ultra HD at 60Hz, HDR10, and Dolby Vision, ensuring vivid visuals. The receiver features built-in Bluetooth and Wi-Fi for seamless wireless connectivity and multi-room audio capabilities. Additionally, it supports high-resolution audio formats and includes MCACC (Multi-Channel Acoustic Calibration) for precise sound customization. These technologies enhance both audio and video performance, providing a premium home theater experience. Key highlights include robust codec support and network integration.

Installation and Setup

Installation and setup of the Pioneer VSX-522-K involve unpacking, placing the receiver in a well-ventilated area, connecting devices, and configuring basic settings for optimal performance.

3.1. Unpacking and Physical Installation

Carefully unpack the Pioneer VSX-522-K receiver and ensure all components, including the remote and cables, are included. Place the receiver on a stable, well-ventilated surface to prevent overheating. Connect your devices such as speakers, HDMI sources, and subwoofers to the appropriate ports. Ensure proper cable management for a clean setup. Follow the manual’s diagram for correct port assignments and refer to the quick start guide for initial connections. Once physically installed, proceed to power it on and begin configuring settings. Always handle the receiver with care to avoid damage.

3.2. Initial Configuration and Settings

After powering on the VSX-522-K, navigate through the on-screen menu to set your preferred language and display settings. Configure the speaker setup by selecting the number of channels and assigning each speaker’s role. Set the HDMI output resolution to match your TV’s capabilities. Enable any desired audio modes, such as Dolby Pro Logic II, for immersive sound. Use the auto-calibration feature to optimize speaker levels and distances. Save your settings and test the output to ensure proper functionality across all connected devices. This step ensures a personalized and optimal home theater experience.

Using the Pioneer VSX-522-K Remote Control

The remote control provides intuitive access to key functions like power on/off, volume control, and input selection. Use it to navigate menus and adjust settings effortlessly.

4.1. Remote Control Layout and Functions

The remote control for the Pioneer VSX-522-K is ergonomically designed with a user-friendly layout. It features essential buttons such as power, volume, and input selection. Navigation controls allow easy access to menus, while playback buttons enable seamless operation of connected devices. The remote is labeled clearly for intuitive use, ensuring quick adjustments to settings like sound modes or input sources. It operates via infrared technology for reliable performance. Battery installation is straightforward, and the remote is pre-programmed to work seamlessly with the receiver. Refer to the manual for detailed button functions.

4.2. Customizing Remote Control Settings

The Pioneer VSX-522-K remote allows users to customize settings for enhanced control. Button assignments can be remapped to suit preferences, enabling quick access to frequently used functions. The remote also supports learning capabilities, allowing it to mimic commands from other device remotes. Through the receiver’s menu, users can program macros for multi-step operations. Customized settings ensure a personalized experience, streamlining control of connected devices. Refer to the manual for detailed instructions on tailoring remote functions to your specific needs.

Troubleshooting Common Issues

This section helps identify and resolve common problems, such as connectivity issues, audio glitches, or firmware updates, ensuring smooth operation of your Pioneer VSX-522-K receiver.

5.1. Common Connectivity Problems

Users may encounter issues like no signal, unstable connections, or devices not pairing. Check HDMI cables, ensure correct input selection, and verify device settings. Restarting the receiver or connected devices often resolves connectivity hiccups. For wireless issues, ensure Bluetooth is enabled, devices are in range, and there are no physical obstructions. Updating firmware or resetting the receiver to factory settings can also address persistent connectivity problems. Always refer to the manual for specific troubleshooting steps tailored to your Pioneer VSX-522-K.

5.2. Resolving Audio and Video Glitches

To fix audio or video issues, first ensure all connections are secure and properly configured. Restart the receiver and connected devices to reset the system. Disable any unnecessary audio processing features and ensure the correct input mode is selected. If video glitches occur, check the HDMI cable quality and verify that all devices support the same resolution. For audio issues, reset the receiver to factory settings or update the firmware to resolve software-related problems. Always consult the manual for detailed troubleshooting guidance.

Maintenance and Care Tips

Regularly clean the receiver with a soft cloth to prevent dust buildup. Ensure proper ventilation to avoid overheating. Update firmware for optimal performance. Store the manual safely for quick reference.

6.1. Cleaning the Receiver

To maintain the Pioneer VSX-522-K receiver’s performance, clean it regularly. Power off the receiver and unplug it for safety. Use a soft, dry cloth to wipe the exterior, avoiding harsh chemicals or liquids. For stubborn dust, lightly dampen the cloth but ensure no moisture enters vents or ports. Avoid touching internal components. Clean the front panel gently to prevent scratches. Regular cleaning prevents dust buildup, ensuring proper airflow and optimal functionality. Store the receiver in a cool, dry place to prolong its lifespan.

6.2. Updating Firmware and Software

Regular firmware and software updates are essential for the Pioneer VSX-522-K receiver to ensure optimal performance and access to new features. To update, visit Pioneer’s official website, download the latest firmware version, and transfer it to a USB drive. Insert the USB into the receiver, navigate to the System Menu, and select Firmware Update. Follow on-screen instructions and avoid interrupting the process. Updating ensures compatibility with the latest technologies and improves overall functionality. Always check for updates periodically to maintain peak performance.

Connecting Devices to Pioneer VSX-522-K

The Pioneer VSX-522-K offers seamless connectivity options, including HDMI, Bluetooth, and optical inputs, ensuring easy integration with modern devices for enhanced audio and video experiences.

7.1. HDMI and Optical Connections

The Pioneer VSX-522-K features multiple HDMI inputs, enabling seamless connectivity with 4K devices like Blu-ray players and gaming consoles. Each HDMI port supports 4K resolution at 60Hz, ensuring crisp visuals. Optical inputs provide reliable digital audio connections from TVs, CD players, or other sources. ARC (Audio Return Channel) support simplifies TV integration, allowing audio to be sent back through the HDMI connection. HDCP 2.2 compatibility ensures secure transmission of 4K content. The receiver’s manual guides users through a straightforward setup process for both HDMI and optical connections, ensuring optimal performance and compatibility.

7.2. Wireless and Bluetooth Pairing

The Pioneer VSX-522-K supports wireless connectivity, offering Bluetooth pairing for seamless audio streaming from smartphones and tablets. This feature allows users to enjoy high-quality sound wirelessly, with stable connections ensuring uninterrupted playback. The receiver’s Bluetooth technology supports advanced audio codecs, delivering clear and detailed sound reproduction. Additionally, Wi-Fi connectivity enables integration with smart home systems, enhancing the overall entertainment experience. The user manual provides step-by-step instructions for pairing devices, ensuring a smooth and hassle-free setup process for optimal wireless performance and convenience.

Audio Calibration and Settings

The Pioneer VSX-522-K offers advanced audio calibration options, allowing users to fine-tune settings for optimal sound quality, including sound modes and EQ adjustments, ensuring a personalized listening experience.

8.1. Adjusting Sound Modes

The Pioneer VSX-522-K features multiple sound modes to enhance your listening experience. Choose from Movie, Music, or Game modes to optimize audio for different content types. These modes adjust EQ settings, surround sound parameters, and bass levels for immersive sound. Use the remote to easily switch modes or customize settings via the on-screen menu. Experiment with modes to find the perfect balance for your media. For a tailored experience, save your preferences to ensure consistent sound quality across all your entertainment.

8.2. Fine-tuning EQ and Audio Parameters

To optimize your audio experience with the Pioneer VSX-522-K, explore its Advanced EQ Settings. Adjust the bass, midrange, and treble to balance frequencies according to your preference. Consider your room’s acoustics, as soft furnishings absorb high frequencies, while hard surfaces reflect sound. Use the crossover setting to determine where low frequencies route to the subwoofer. Test with familiar music to hear real-time changes. Save profiles for different media types, like movies or music. Experiment with Dolby Atmos and DTS:X settings for immersive sound. Reset settings if needed.

Advanced Features of Pioneer VSX-522-K

The Pioneer VSX-522-K features multi-zone audio support, allowing playback in multiple rooms. It supports 4K resolution, Dolby Atmos, and DTS:X for immersive sound. Built-in Wi-Fi and Bluetooth enable seamless wireless connectivity.

9.1. Multi-Zone Audio Support

The Pioneer VSX-522-K offers multi-zone audio support, enabling playback of different audio sources in multiple rooms. With this feature, users can enjoy independent listening experiences in Zone 1 and Zone 2. The receiver supports HDMI inputs and analog RCA outputs for connecting external devices. It allows for separate volume control and the ability to play different sources simultaneously. This feature enhances home theater flexibility, making it ideal for whole-house audio systems. The setup is straightforward, with options to configure zones via the on-screen menu.

9.2. Integration with Smart Home Systems

The Pioneer VSX-522-K seamlessly integrates with popular smart home systems, enabling voice control and unified system management. Compatible with platforms like Amazon Alexa and Google Assistant, users can command their home theater experience hands-free. The receiver also supports custom integrations, allowing synchronization with other smart devices for a cohesive entertainment environment. This feature enhances convenience and modernizes your home theater setup, ensuring compatibility with the latest smart technologies for a future-proof system.

Warranty and Customer Support

The Pioneer VSX-522-K is backed by a limited warranty, offering coverage for parts and labor. Customers can access support through phone, email, or the official website.

10.1. Understanding the Warranty Coverage

The Pioneer VSX-522-K comes with a one-year limited warranty covering manufacturing defects in materials and workmanship. This includes repairs or replacements for faulty components, ensuring reliable performance. Proper registration and adherence to usage guidelines are required to maintain warranty validity. Extended service plans may be available for additional coverage. For detailed terms and conditions, refer to the official Pioneer website or contact customer support for assistance.

10.2. Contacting Pioneer Customer Service

For assistance with the VSX-522-K, Pioneer provides multiple support channels. Visit their official website for contact details, FAQs, and downloadable resources. Phone and email support are available for direct inquiries. Additionally, live chat options may be accessible for immediate help. Online forums and community support pages offer troubleshooting tips and user discussions. Ensure to have your product serial number and details ready for efficient service. Pioneer’s customer service team is committed to resolving issues promptly, ensuring optimal performance of your receiver.

The Pioneer VSX-522-K receiver offers exceptional performance, blending advanced features with user-friendly design. With reliable customer support, it remains a top choice for home theater enthusiasts seeking quality and innovation.

11.1. Final Thoughts on Pioneer VSX-522-K

The Pioneer VSX-522-K receiver is a versatile and powerful home theater solution, offering 4K support, multi-zone audio, and advanced technologies for immersive sound. Its user-friendly design and robust features make it ideal for both casual users and audiophiles. With reliable performance and extensive connectivity options, it enhances any home entertainment system. The included manual ensures easy setup and customization, allowing users to optimize their audio-visual experience. This receiver is a testament to Pioneer’s commitment to innovation and quality in home audio systems.

11.2. Encouragement to Explore More Features

Exploring the Pioneer VSX-522-K’s advanced features can significantly enhance your home theater experience. Dive into settings like multi-zone audio, smart home integration, and EQ customization to unlock its full potential. Experimenting with these options allows you to tailor the system to your preferences, ensuring optimal sound and video quality. Don’t hesitate to venture beyond the basics—each feature is designed to elevate your entertainment setup.

PDF

travis picking patterns pdf

Travis picking is a foundational fingerstyle guitar technique rooted in country music, popularized by Merle Travis. It involves alternating bass patterns with melodic fills, creating a rhythmic, harmonic sound. This method is essential for fingerstyle enthusiasts, offering versatile patterns adaptable to various musical genres. With resources like Paul Pigat’s lessons and downloadable PDF tabs, learning Travis picking has never been more accessible.

History and Background of Travis Picking

Travis picking, named after Merle Travis, emerged in the mid-20th century as a unique fingerstyle guitar technique. It combines thumb-picked bass lines with finger-picked melodies, creating a distinctive rhythmic sound. This style, popularized by Travis and later by Chet Atkins, became a cornerstone of country music and influenced folk and rock. Its origins reflect the blending of Appalachian string-band traditions with modern guitar techniques, making it a foundational method for fingerstyle players.

Origins of Travis Picking

Travis picking traces its roots to Appalachian folk traditions and early country music. Named after Merle Travis, it emerged in the 1940s and 1950s as a unique fingerstyle technique. This method combines thumb-picked bass lines on lower strings with finger-picked melodies on higher strings, creating a dynamic interplay. The style was heavily influenced by the guitar playing of Arnold Shultz and Ike Everly, who blended African-American blues with Appalachian string-band music. Merle Travis popularized this technique in hits like “Sixteen Tons” and “Divorce Me C.O.D.,” making it a cornerstone of country music and a lasting influence on fingerstyle guitar.

Famous Guitarists Who Popularized Travis Picking

Merle Travis is the namesake and pioneer of Travis picking, bringing the technique to the forefront of country music. Chet Atkins adopted and refined the style, incorporating it into his virtuosic playing. Doc Watson also embraced Travis picking, blending it with bluegrass and folk to create a unique sound. Modern guitarists like Paul Pigat continue to champion the technique, teaching and expanding its applications. These artists have not only preserved Travis picking but also elevated it, ensuring its relevance across genres. Their contributions have inspired countless players to explore this iconic fingerstyle method, solidifying its place in guitar history. Their influence remains a cornerstone for learning and mastering Travis picking patterns today.

Evolution of Travis Picking Over Time

Travis picking, named after Merle Travis, emerged in the 1940s as a cornerstone of country music. Initially, it featured alternating bass lines with melodic fills, creating a distinctive rhythmic sound. Over time, artists like Chet Atkins refined the technique, blending it with other styles. Doc Watson incorporated Travis picking into folk and bluegrass, expanding its versatility. Modern guitarists continue to evolve the method, integrating it into various genres. The rise of digital resources, such as PDF tabs and video lessons, has made Travis picking more accessible, allowing players to explore its nuances. This evolution ensures Travis picking remains a dynamic and enduring guitar technique, adapting to contemporary musical landscapes while preserving its roots.

Basic Travis Picking Techniques

Travis picking combines thumb and finger independence, creating alternating bass patterns with melodic fills. This technique starts with a two-finger approach, focusing on thumb movement and finger synchronization. The thumb plays steady bass notes, while fingers handle high notes, typically in an off-beat rhythm. Proper hand positioning and nail care enhance tone and control. Starting with simple patterns and gradually incorporating chord changes builds mastery. Resources like PDF tabs and video lessons provide structured learning paths, helping guitarists develop the foundational skills needed for Travis picking. Consistent practice and patience are key to mastering this iconic fingerstyle method.

The Two-Finger Picking Technique

The two-finger picking technique is the cornerstone of Travis picking, involving the thumb and index finger. The thumb alternates between two bass notes, typically on the lower strings, while the index finger plucks higher notes on the off-beats. This creates a dynamic interplay between the steady bass and melodic fills. Proper synchronization and timing are crucial, requiring practice to develop finger independence. Starting with simple patterns, such as alternating bass notes on beats 1 and 3, and index finger fills on beats 2 and 4, helps build the foundation. Resources like PDF tabs and video lessons provide clear guidance, ensuring a smooth learning process. Mastery of this technique opens the door to more complex variations and patterns in Travis picking.

Developing Thumb Independence

Thumb independence is crucial for mastering Travis picking, as it enables the thumb to play steady bass lines while the fingers handle melodic phrases. Start with simple exercises like alternating thumb and finger strokes on open strings to build coordination. Gradually introduce chromatic scales or arpeggios to enhance dexterity. Practice patterns where the thumb plays bass notes on beats 1 and 3, while fingers pluck higher notes on off-beats. Resources like Greg O’Rourke’s exercises or Paul Pigat’s lessons provide structured drills. Consistent practice, even for short periods, strengthens thumb-finger synchronization, allowing for smoother transitions in complex patterns. Over time, this independence will become second nature, enabling seamless execution of intricate Travis picking arrangements.

Fingerstyle guitar forms the foundation of Travis picking, emphasizing individual finger techniques to create complex, layered sounds. Begin by using the thumb for bass lines and index/middle fingers for melodies. Nail care is essential; Paul Pigat highlights the use of acrylic nails for clarity and tone. Start with simple patterns, focusing on alternating bass notes and syncopated rhythms. Practice basic exercises like plucking open strings with different fingers to build dexterity. Gradually incorporate chords, ensuring each string rings clearly. Resources like Tomas Michaud’s cheat sheets and Paul Davids’ tabs offer structured learning paths. Fingerstyle basics are the gateway to mastering Travis picking, enabling you to explore its rich, dynamic possibilities effectively.

Travis Picking Patterns and Variations

Travis picking patterns and variations explore techniques like alternating bass, syncopated rhythms, and chord anchors, offering dynamic ways to enhance musical expression and complexity.

Basic Alternating Bass Pattern

The basic alternating bass pattern is the cornerstone of Travis picking, involving the thumb playing bass notes on beats 1 and 3, while fingers play higher notes on off-beats. This creates a rhythmic, pulsing sound. The pattern typically alternates between the root and fifth of a chord, providing harmonic structure. For example, in a G chord, the thumb alternates between G and D on the lower strings, while fingers play melodic notes on the higher strings. This pattern is foundational for creating the distinctive Travis picking sound. It’s essential for building rhythm and timing, as seen in classic songs like “Cannonball Rag” or “Walk On.” Starting with this pattern helps guitarists develop the necessary thumb independence and coordination.

Syncopated Rhythms in Travis Picking

Syncopated rhythms add complexity and emotional depth to Travis picking patterns by emphasizing off-beat accents. This technique involves placing melodic or bass notes on unexpected parts of the beat, creating a lively, dynamic feel. For instance, a syncopated pattern might place a high note on the “and” of beat 2, adding a rhythmic surprise. Players like Merle Travis and Chet Atkins often used syncopation to enhance their arrangements. To master this, guitarists should practice shifting accents within the alternating bass framework, ensuring precise timing and finger independence. Syncopated rhythms are particularly effective in folk and country music, where they add a touch of personality to the melody.

Using Chord Anchors in Patterns

Chord anchors are essential in Travis picking, providing stability and harmonic clarity within intricate fingerpicking patterns. These anchors are typically played by the thumb on the lower strings, reinforcing the root or fifth of the chord. By maintaining a steady bass line with chord anchors, the fingers can explore melodic lines and fills on the higher strings. This technique allows for smooth transitions between chords and enhances the overall musicality of the piece. Guitarists can incorporate anchors into various patterns, ensuring a solid rhythmic and harmonic foundation while adding complexity to their playing. This method is particularly effective in traditional country and folk styles, where clarity and precision are key.

Advanced Travis Picking Techniques

Advanced techniques involve incorporating chromaticism, complex chord changes, and sophisticated thumb and finger independence to create intricate, dynamic patterns that elevate Travis picking to new heights.

Incorporating Chromaticism in Patterns

Chromaticism adds complexity and emotional depth to Travis picking by introducing non-chordal, passing tones that create tension and release. This technique involves weaving chromatic notes seamlessly into the alternating bass patterns, often using the index or middle fingers to play these embellishments. Advanced players experiment with chromatic passing tones and auxiliary notes to enrich melodic lines. For example, inserting a minor or major third between chord tones can add a sophisticated, modern feel. Timing is crucial, as chromatic notes must align with the rhythmic structure to maintain the pattern’s integrity. Proper finger independence and a strong understanding of chord shapes are essential for executing these intricate variations effectively.

Advanced Thumb and Finger Independence

Mastering advanced thumb and finger independence is crucial for executing complex Travis picking patterns. This involves training the thumb to play alternating bass lines while the fingers handle intricate melodies and chordal work. Exercises like chromatic scales and arpeggios help build dexterity. Players often use specific drills, such as alternating between thumb and fingers on non-adjacent strings, to enhance coordination. Paul Pigat’s lessons emphasize the importance of finger independence, while resources like Greg O’Rourke’s exercises provide structured pathways for improvement. As skill progresses, musicians can incorporate advanced techniques like simultaneous thumb and fingerpicking, creating rich, layered sounds. This level of independence allows for seamless transitions between chords and melodies, elevating the overall musicality of Travis picking patterns.

Travis Picking with Advanced Chord Changes

Travis picking with advanced chord changes involves seamlessly integrating intricate fingerstyle patterns while navigating complex chord progressions. This technique requires a deep understanding of chord structures and the ability to adapt patterns to various harmonic contexts. By using chord anchors, players can maintain a consistent rhythmic foundation while transitioning between chords. Advanced chord changes often involve alternating between close and open voicings, creating a dynamic interplay between the melody and bass lines. Resources like Paul Pigat’s lessons and PDF tabs provide detailed guidance on applying Travis picking patterns to sophisticated chord sequences. Practicing with a metronome and focusing on smooth transitions ensures that the music remains cohesive and engaging, even with intricate chord changes. This skill elevates Travis picking to a more refined and expressive level, suitable for advanced players.

Learning Resources and Materials

Travis picking enthusiasts can access various resources, including PDF tabs, video lessons, and eBooks. Websites like Tomasmichaud.Com offer comprehensive guides and the Ultimate Fingerpicking Pattern Cheat Sheet.

Recommended PDF Resources for Travis Picking

For mastering Travis picking, several high-quality PDF resources are available. Travis Picking Tabs by Paul Davids offers intermediate-level exercises, while The Ultimate Fingerpicking Pattern Cheat Sheet by Tomas Michaud provides a comprehensive guide. Additionally, Travis Picking Development Exercises by Greg O’Rourke and Travis Picking Patterns for Every Chord are excellent for building finger independence and exploring chord variations. Many of these resources are free or available for a small fee, making them accessible to guitarists of all levels. These PDFs often include tabs, exercises, and detailed patterns to help learners practice effectively. They are invaluable tools for both beginners and advanced players looking to refine their Travis picking skills.

Video Lessons for Visual Learning

Video lessons provide an excellent way to visually grasp Travis picking techniques. Paul Pigat’s Travis picking and hillbilly fingerstyle guitar lessons are highly recommended, offering clear instruction and demonstrations. Additionally, Greg O’Rourke’s video tutorials on platforms like YouTube and his website break down complex patterns into manageable parts. These lessons often include slow playthroughs and detailed close-ups, making it easier for learners to follow along. Many instructors also incorporate chord progressions and real-world examples, helping students apply Travis picking in practical musical contexts. Video lessons are particularly beneficial for visual learners, as they allow for observation of finger placement, picking hand technique, and rhythm execution in real time. This visual guidance enhances understanding and accelerates the learning process significantly.

Books and eBooks on Travis Picking

Several books and eBooks are available to help master Travis picking patterns; Greg O’Rourke’s exercises and Tomas Michaud’s “The Ultimate Fingerpicking Pattern Cheat Sheet” are excellent resources, offering detailed patterns and techniques. Paul Pigat’s instructional materials also provide comprehensive guides for fingerstyle guitar, including Travis picking. These resources often include tab notations, making it easier to follow along. Many eBooks focus on breaking down complex patterns into simpler exercises, allowing learners to build skills progressively. Additionally, books like “How To Travis Pick: 4 Simple Patterns For The Fingerstyle Guitarist” cater to both beginners and intermediate players. These materials are invaluable for those seeking structured learning and practical applications of Travis picking techniques.

Practical Exercises for Mastery

Mastering Travis picking requires consistent practice. Start with simple finger independence exercises, then progress to slow playthroughs of patterns. Use metronomes to refine timing and precision.

Exercises for Building Finger Independence

Finger independence is crucial for mastering Travis picking. Begin with simple exercises where the thumb plays bass notes on beats 1 and 3, while the fingers play high notes on off-beats. Gradually introduce alternating patterns, focusing on smooth transitions between strings. Practice chromatic scales or arpeggios to enhance dexterity. Use exercises like “Hanukkah O Hanukkah” or “Bile Them Cabbage Down” to apply these skills musically. Incorporate metronome work to improve timing and precision. Greg O’Rourke’s exercises and resources from tomasmichaud.com offer structured approaches. Start slow, ensuring clarity and control, then increase speed. Consistency is key to developing the independence needed for complex Travis picking patterns.

Slow Playthroughs for Pattern Mastery

Slow playthroughs are essential for mastering Travis picking patterns; Begin by breaking down complex patterns into smaller sections, focusing on accuracy and timing. Use a metronome or slow-down software to practice at a tempo where every note is clear. Pay attention to string attack and finger placement to avoid muddiness. Gradually increase speed as confidence grows. Resources like Paul Pigat’s lessons and Tomas Michaud’s PDF guides provide structured exercises. Slow playthroughs help build muscle memory and ensure a polished performance. Regular practice with patience yields lasting improvement in Travis picking techniques. This methodical approach is vital for achieving mastery.

Practicing with Metronomes

Practicing with a metronome is crucial for developing precise timing and rhythm in Travis picking. Start by setting a slow tempo to focus on accuracy, gradually increasing speed as you build confidence. This tool helps maintain a steady groove and improves syncopation. Use subdivisions to refine your sense of rhythm, ensuring each note aligns perfectly with the beat. Metronomes are especially useful for mastering complex patterns and chord changes. Resources like Paul Pigat’s lessons and Tomas Michaud’s PDF guides often include exercises tailored for metronome practice. Regular use enhances timing consistency, making your playing more polished and professional. A metronome is indispensable for serious Travis picking mastery.

Common Mistakes and Solutions

Common mistakes in Travis picking include poor timing, weak tone, and lack of finger independence. Regular practice with a metronome improves timing accuracy, while focusing on nail care enhances tone. Building finger dexterity through exercises prevents fatigue and ensures smooth transitions between patterns. Addressing these issues early on fosters better technique and overall mastery of the style.

Common Errors in Travis Picking

One of the most frequent mistakes when learning Travis picking is improper thumb placement, leading to muffled bass notes. Many players also struggle with syncing the thumb and fingers, causing rhythmic inconsistencies. Another error is neglecting finger independence, which hinders smooth transitions between chords. Additionally, overreliance on fingerpicks can limit tone quality, while poor nail care affects sound clarity. Rushing through patterns without a metronome often results in timing issues. Lastly, inadequate practice of basic patterns before advancing to complex variations can lead to frustration and poor technique. Addressing these errors early ensures a stronger foundation and better overall performance. Regular practice and attention to detail are key to overcoming these challenges.

Troubleshooting Poor Tone or Timing

Achieving optimal tone and timing in Travis picking requires careful attention to technique. Finger placement and nail length significantly impact sound quality; improperly placed fingers can muffle notes, while overly long nails may cause a harsh tone. String attack angle is also crucial—using the pads of the fingers rather than the tips ensures a warmer sound. For timing issues, metronome practice is essential to maintain a steady rhythm. Slow playthroughs of patterns help identify and correct syncopation errors. Additionally, ensuring relaxed hand positioning prevents fatigue and improves accuracy. By addressing these factors, players can refine their tone and timing, leading to a polished and professional sound in their Travis picking. Regular practice and focused troubleshooting are vital for mastery.

Preventing Burnout and Maintaining Motivation

Maintaining motivation while mastering Travis picking requires a balanced approach. Setting realistic goals and celebrating small victories helps sustain enthusiasm. Incorporating variety in practice, such as exploring different musical genres or patterns, prevents monotony. Using tools like metronomes and slow playthroughs allows players to track progress, fostering a sense of achievement. Taking regular breaks and prioritizing relaxation are crucial to avoid physical and mental fatigue. Staying inspired by listening to legendary guitarists like Merle Travis and Chet Atkins can reignite passion. Engaging with a supportive community or sharing progress with fellow musicians also enhances motivation. By embracing these strategies, learners can enjoy a fulfilling and sustainable journey in mastering Travis picking patterns.

Mastering Travis picking patterns is a rewarding journey that combines technical skill with musical expression. By breaking down techniques into manageable exercises and utilizing resources like PDF tabs and video lessons, players can steadily progress. The ability to adapt patterns across genres and chord changes makes Travis picking a versatile tool for musicians. Remember, consistent practice and patience are key to overcoming challenges. Exploring the music of legends like Merle Travis and Chet Atkins can inspire creativity and motivation. With dedication, learners can unlock the full potential of Travis picking, transforming simple patterns into captivating performances that resonate with audiences. The journey is as fulfilling as the destination.